Monitor for low organizational inventory
We will use the skills learned in previous sections to enhance the functionality of our YubiEnterprise ServiceNow application to monitor and create an incident if any of our inventory items fall below a specific threshold. We will accomplish this by creating a new action that makes a REST call to the YubiEnterprise API’s GET /inventory method, and a workflow that calls this action on a daily occurrence.
Create an action to get inventory details
We will start by creating an action that will allow us to get information about the inventory in our YubiEnterprise organization. We will use this information to detect if any of our inventory stocks have fallen under a specific threshold.
Action properties
On the ServiceNow home screen, search for flow designer.
Click Flow Designer, a new window should open.

Once the Flow Designer page opens, click the Create new button, then select Action.

A menu will appear to configure the action's properties. Use the following values to initialize your action.
- Action name: YubiEnterprise get low inventory
- Application: YubiEnterprise Delivery App
- Description: Get information about your organization's YubiEnterprise inventory that has fallen below your defined threshold
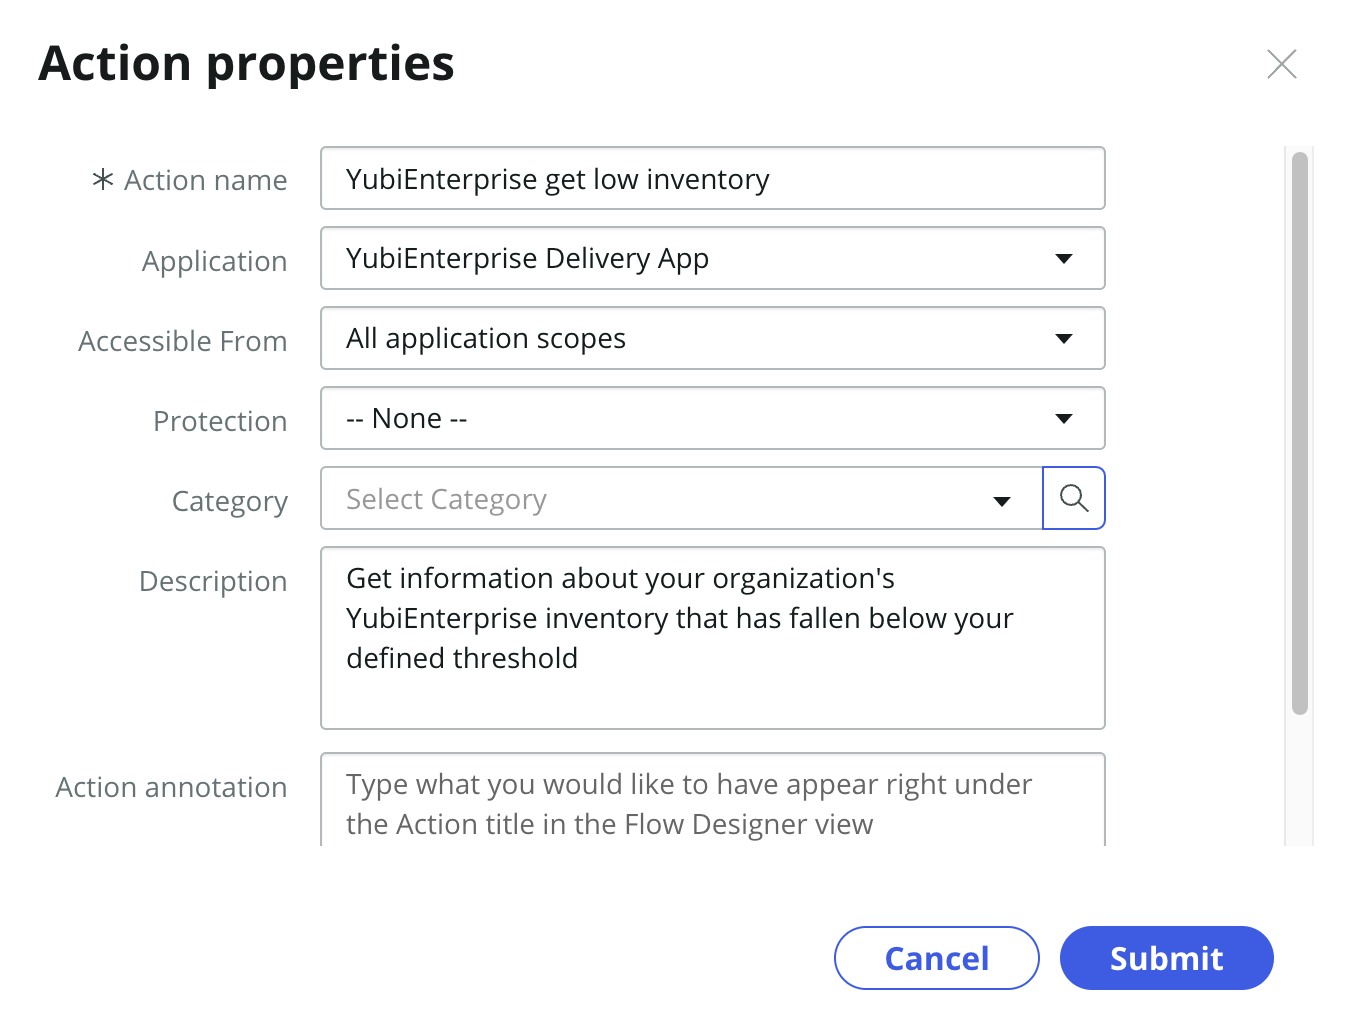
Click Submit.
Action inputs
Next we are going to configure the inputs that go into the action. This input is the threshold used to evaluate the different inventory buckets in your YubiEnterprise Console.
For each row in the table below, perform the following steps:
- Click the +Create Input button at the top.
- Fill in the input using the data provided below to the corresponding field (note that name will be automatically input).
| Label | Type | Mandatory |
|---|---|---|
| Inventory threshold | Integer | on |
Your actions input menu should look like the example below.

Click Save once your inputs are complete.
API REST call
Next we will configure the action step for making the REST HTTP call to the YubiEnterprise Delivery API.
On the left side, in the Action Outline, click the bottom blue + button.
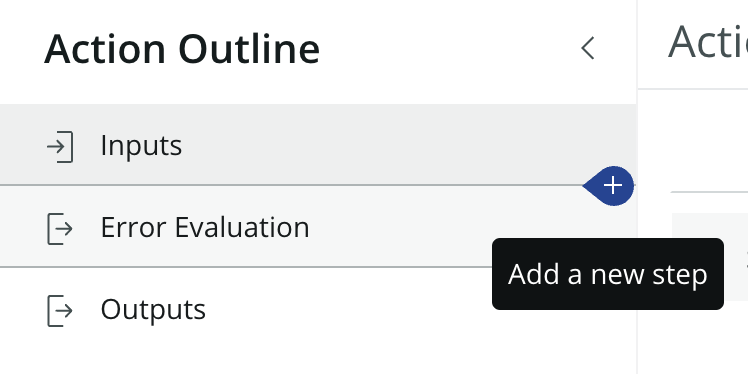
Search for rest and select the REST option
If the REST option does not appear then you have not activated the IntegrationHub plugin. Follow the instructions in the prerequisites section.

Connection details
First we will add our API credentials to the REST call. We will utilize the connection alias that was created earlier in this guide.
Ensure that the Connection field is set to Use Connection Alias.
Change the Connection Alias to the one created earlier in the guide. The Base URL should be set automatically based on the connection alias.
Your connection details should look like the example below.

Request details
Next we will configure the details of the API method call. We will be utilizing the GET /inventory API method
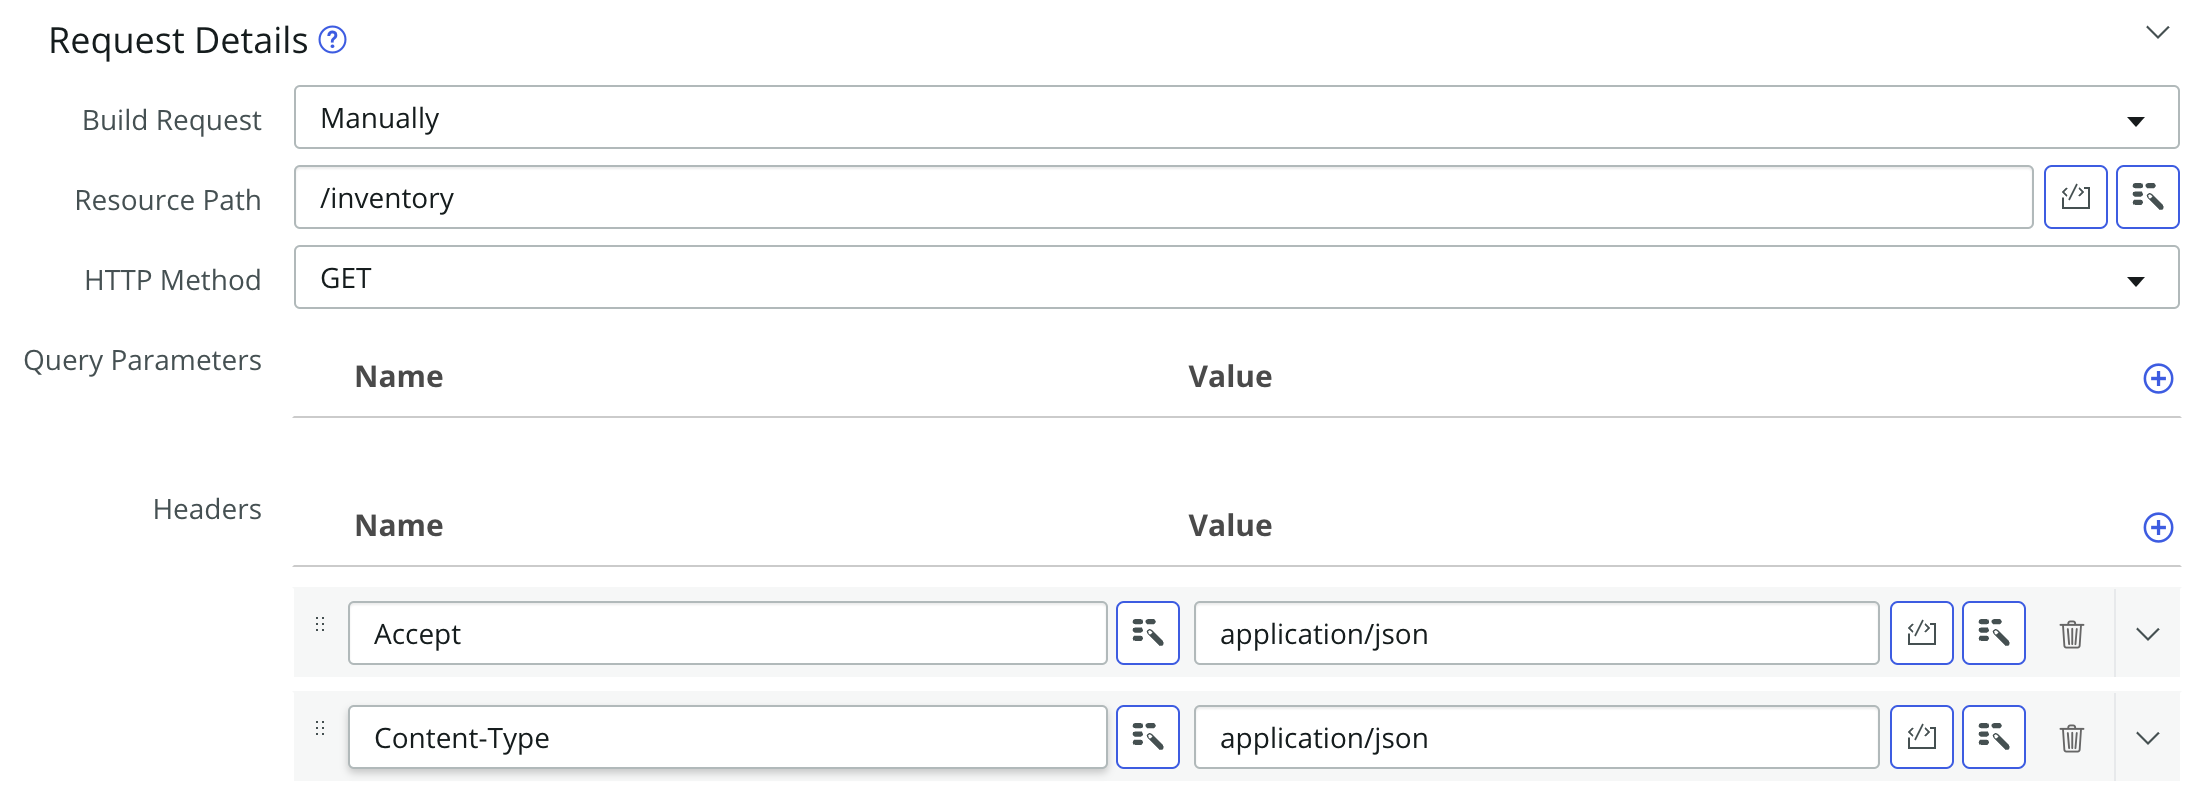
Configure the Request Details section with the following values:
- Build Request: Manually
- Resource Path: /inventory
- HTTP Method: GET
The Headers should include two header properties using the values below
| Name | Value |
|---|---|
| Accept | application/json |
| Content-Type | application/json |
Your request details should look like the example below.
Output script
We will now create a script to format the outputs of the action. This will ensure that we are able to evaluate all of the buckets in your inventory to ensure that we only alert you to the items below your specific threshold.
On the left side, in the Action Outline, click the bottom blue + button.
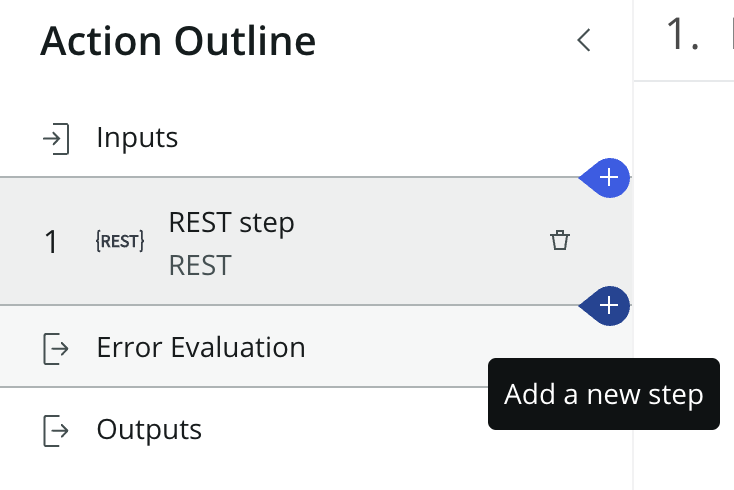
Search for scripts and select the Script option

Script inputs
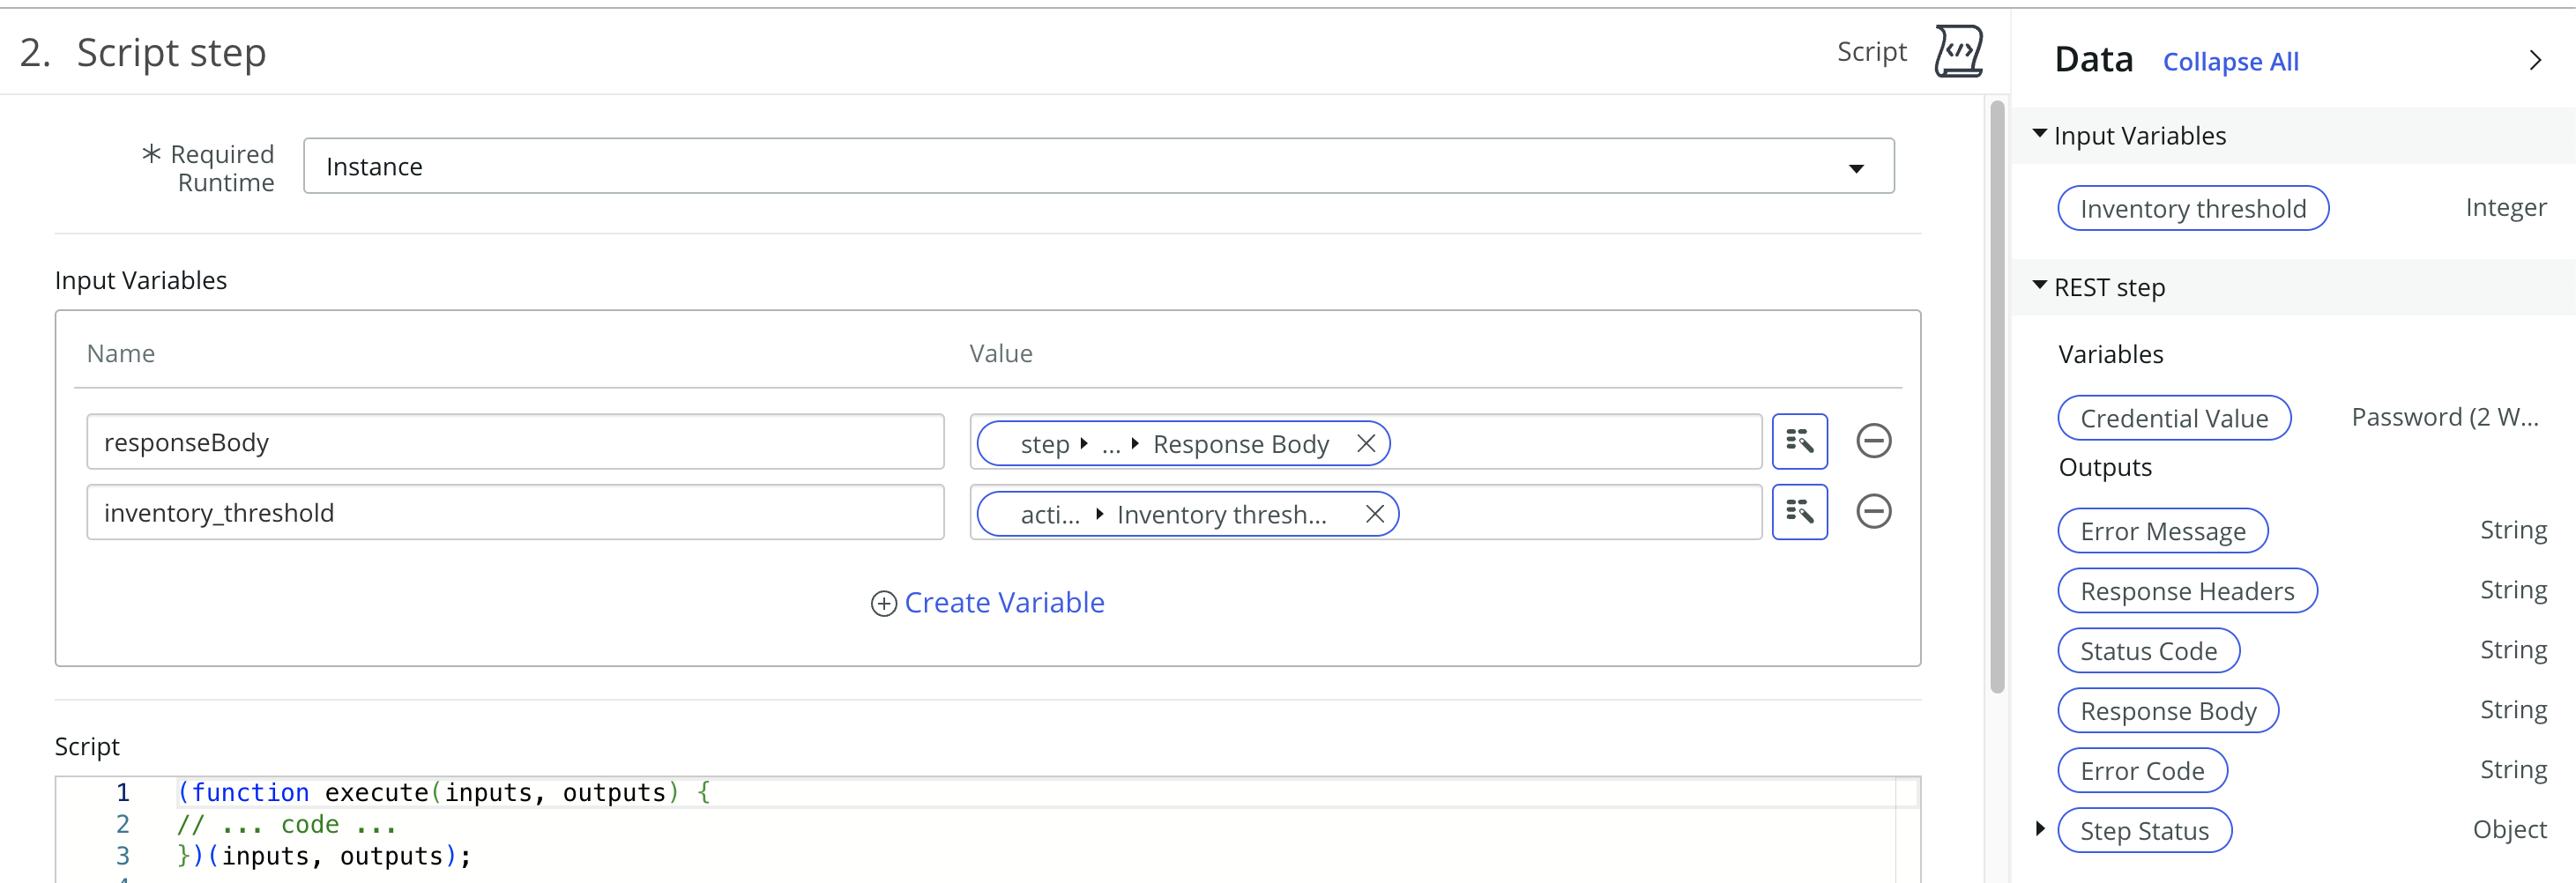
We'll start by creating the input for the script.
- Click the +Create Variable button
- Name: responseBody (case sensitive)
- Value: Drag the Response Body data pill from the REST step section on the right side of the menu
- Click the +Create Variable button
- Name: inventory_threshold (case sensitive)
- Value: Drag the Inventory threshold data pill from the Input Variables section in the Data window on the right side of the menu
Your script inputs menu should look like the example below.
Adding the script
Next we are going to add a script to Script field. Copy the script provided below into the Script field.
(function execute(inputs, outputs) {
  outputs.low_inventory_found = true;
  const response = JSON.parse(inputs.responseBody);
  const org_prod_inv = response.organization_product_inventory;
  var below_threshold = "";
  for (var i = 0; i < org_prod_inv.length; i++) {
    var item = org_prod_inv[i];
    if (item.organization_product_quantity < inputs.inventory_threshold) {
      var newMessage =
        item.product_name +
        ": Remaining Inventory - " +
        item.organization_product_quantity +
        ", ";
      below_threshold += newMessage;
    }
  }
  if (below_threshold === "") {
    outputs.low_inventory_found = false;
  }
  outputs.inventory_message = below_threshold;
})(inputs, outputs);
Script outputs
Lastly, we will add the output variables for the script
For each row in the table below, perform the following steps:
- Click the +Create Variable button at the bottom.
- Fill in the input using the data provided below to the corresponding field (note that name will be automatically input).
| Label | Type | Mandatory |
|---|---|---|
| inventory_message | String | off |
| low_inventory_found | True/False | off |
Your script outputs menu should look like the example below.

Click Save once your output script is complete
Action outputs
Lastly we will define the outputs of the action. These outputs will be usable by the final flow that will evaluate whether or not to submit an incident.
We will start by clicking the Outputs tab in the Action Outline pane.
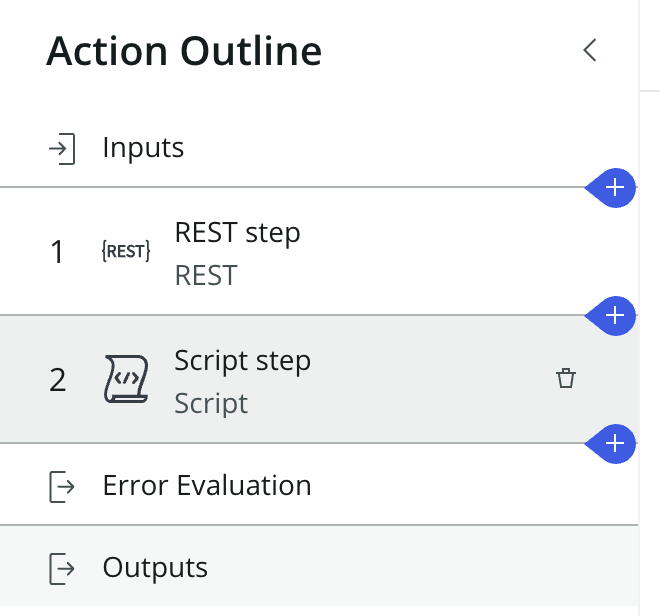
Next we are going to configure the outputs.
For each row in the table below, perform the following steps:
- Click the +Create Output button at the top.
- Fill in the input using the data provided below to the corresponding field (Note: Unlike the previous examples, the Name field is not auto-populated).
| Label | Name | Type | Mandatory |
|---|---|---|---|
| HTTP Status Code | http_status_code | String | off |
| HTTP Error Code | http_error_code | String | off |
| HTTP Error Message | http_error_message | String | off |
| Inventory Message | inventory_message | String | off |
| Low Inventory Found | low_inventory_found | True/False | off |
Your actions outputs menu should look like the example below.
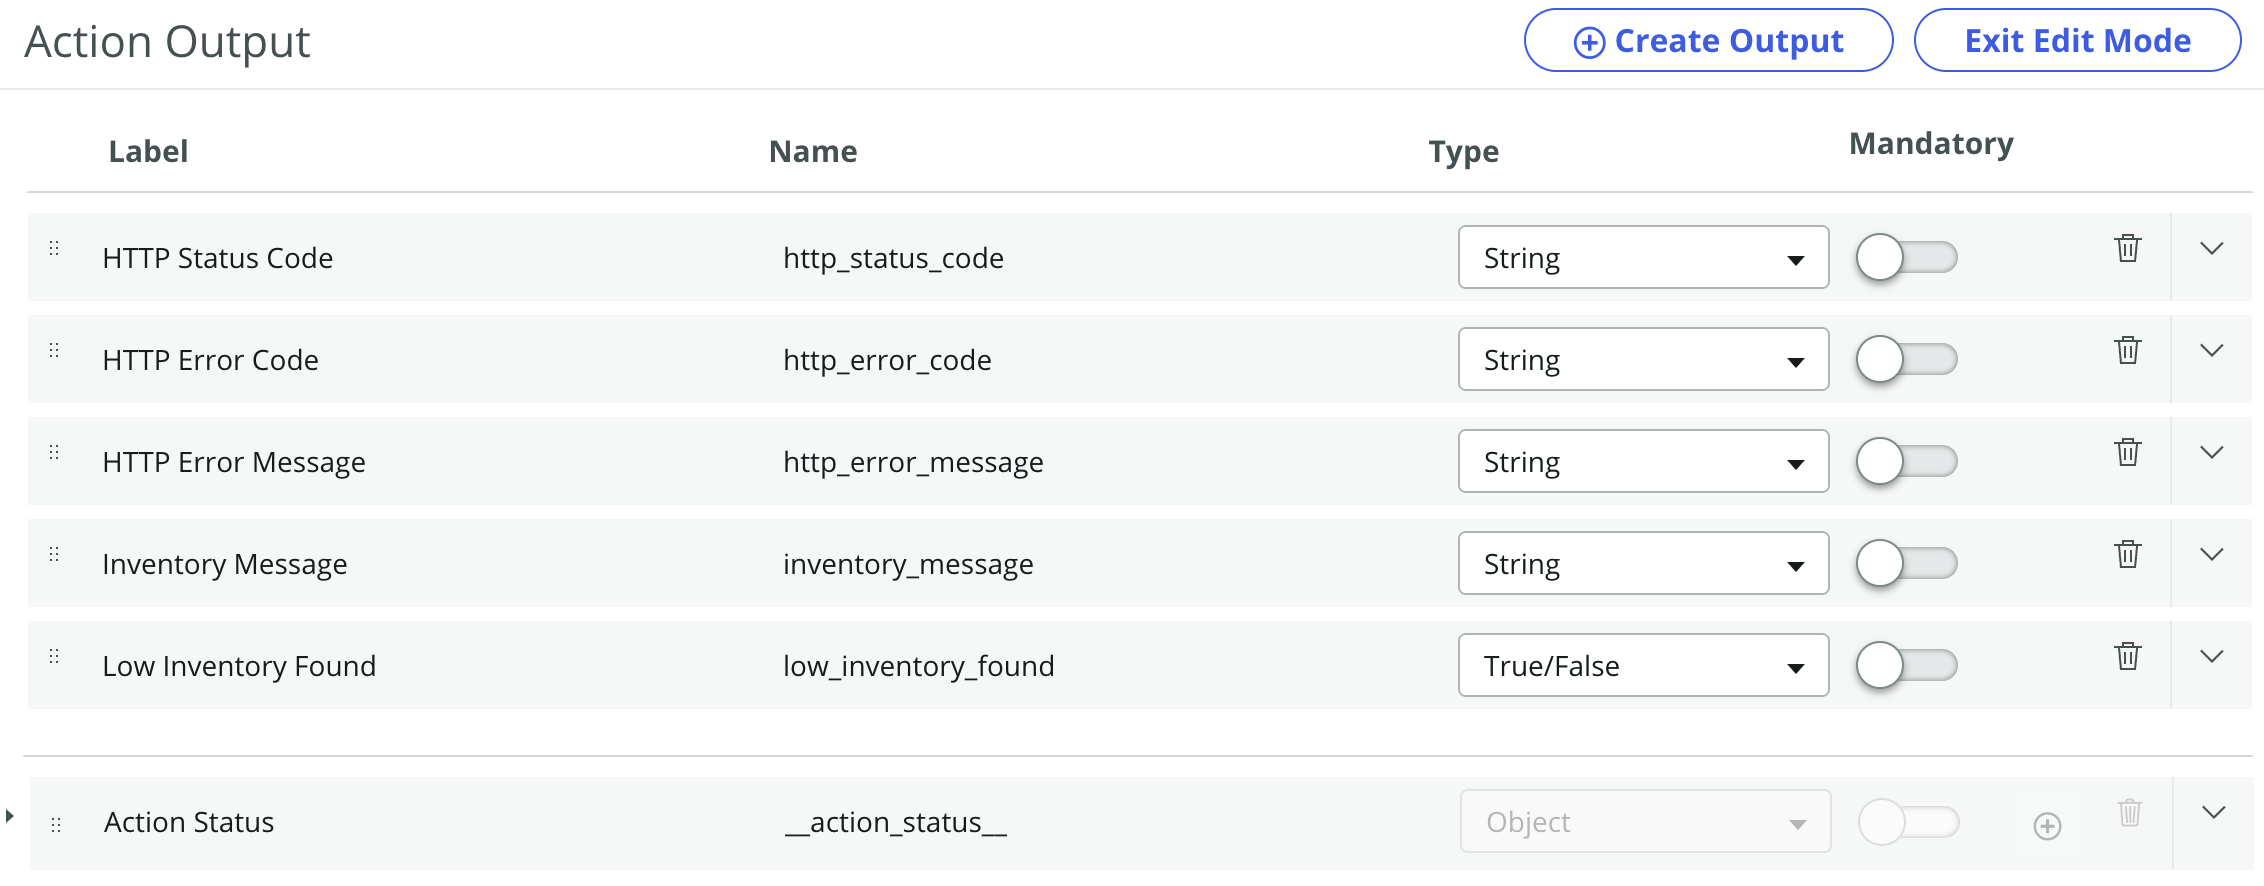
Once complete, press the Exit Edit Mode button on the top of the menu.
A new menu should appear showing the outputs you just defined with empty Value fields. For each output, you will add a data pill from the REST step and the second Script step sections on the right side of the menu
Use the table below to correlate the correct data pill to a label.
| Label | Section > Data pill |
|---|---|
| HTTP Status Code | REST step > Status Code |
| HTTP Error Code | REST step > Error Code |
| HTTP Error Message | REST step > Error message |
| Inventory Message | Script step > inventory_message |
| Low Inventory Found | Script Step > low_inventory_found |
Your actions outputs menu should look like the example below.
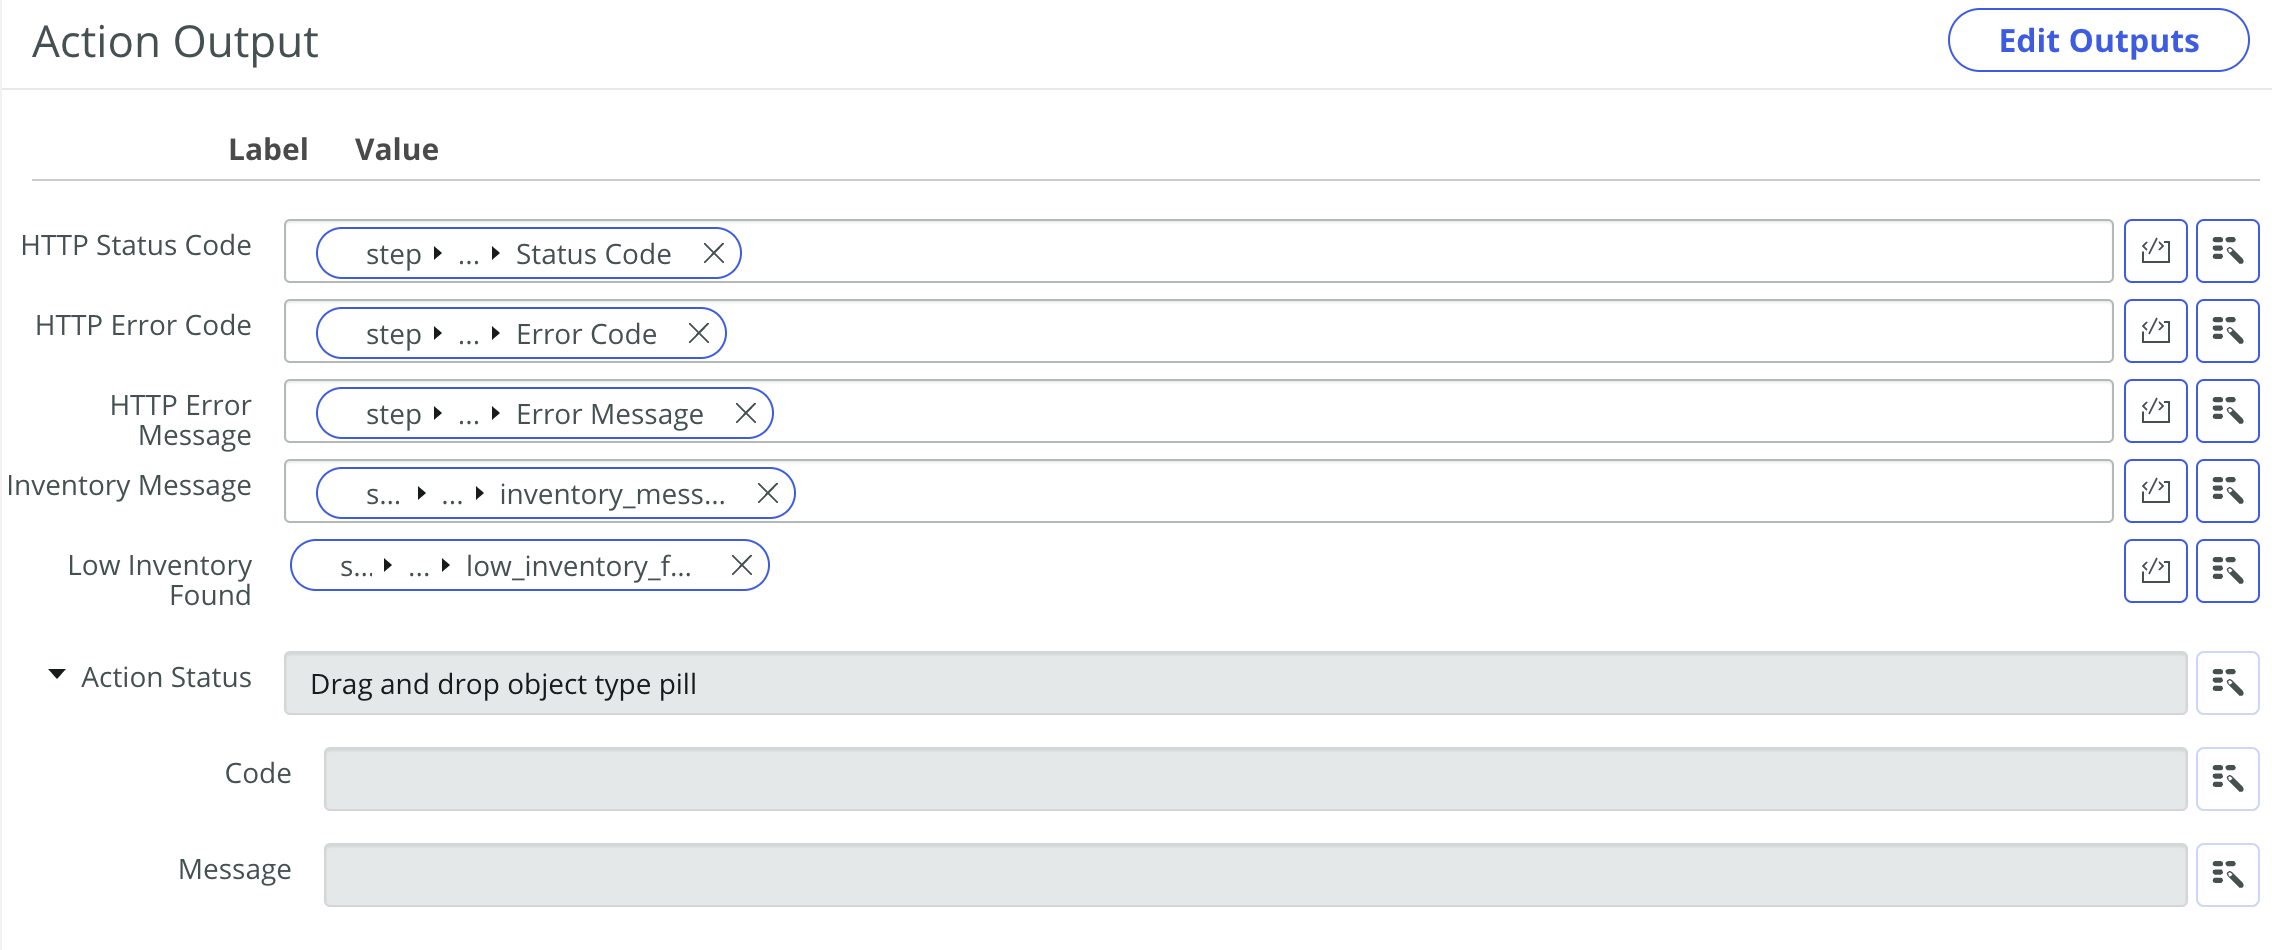
Click Save once your outputs are complete
Test the action
Lastly we want to ensure that the action can be run. This will be used to ensure that our API credentials + script + REST call are configured correctly.
At the top of the Actions menu, click the Test button

A menu should appear, which will ask for a Inventory threshold.
You may want to run two different tests
- One with a number below all of your inventory buckets
- One with a number above one or all of your inventory buckets
The goal of these tests will be to show that your action can respond correctly when all buckets are above your threshold, and when one item falls below the threshold.
Below are some tips and pitfalls to watch out for in this initial test
- If you receive a 401 error, that means your API credentials are not correct
When ready click the Run Test button at the bottom of the screen.
Wait on the current page until a message appears saying "Your test has finished running. View the action execution details."

Click on the message to see the execution details.
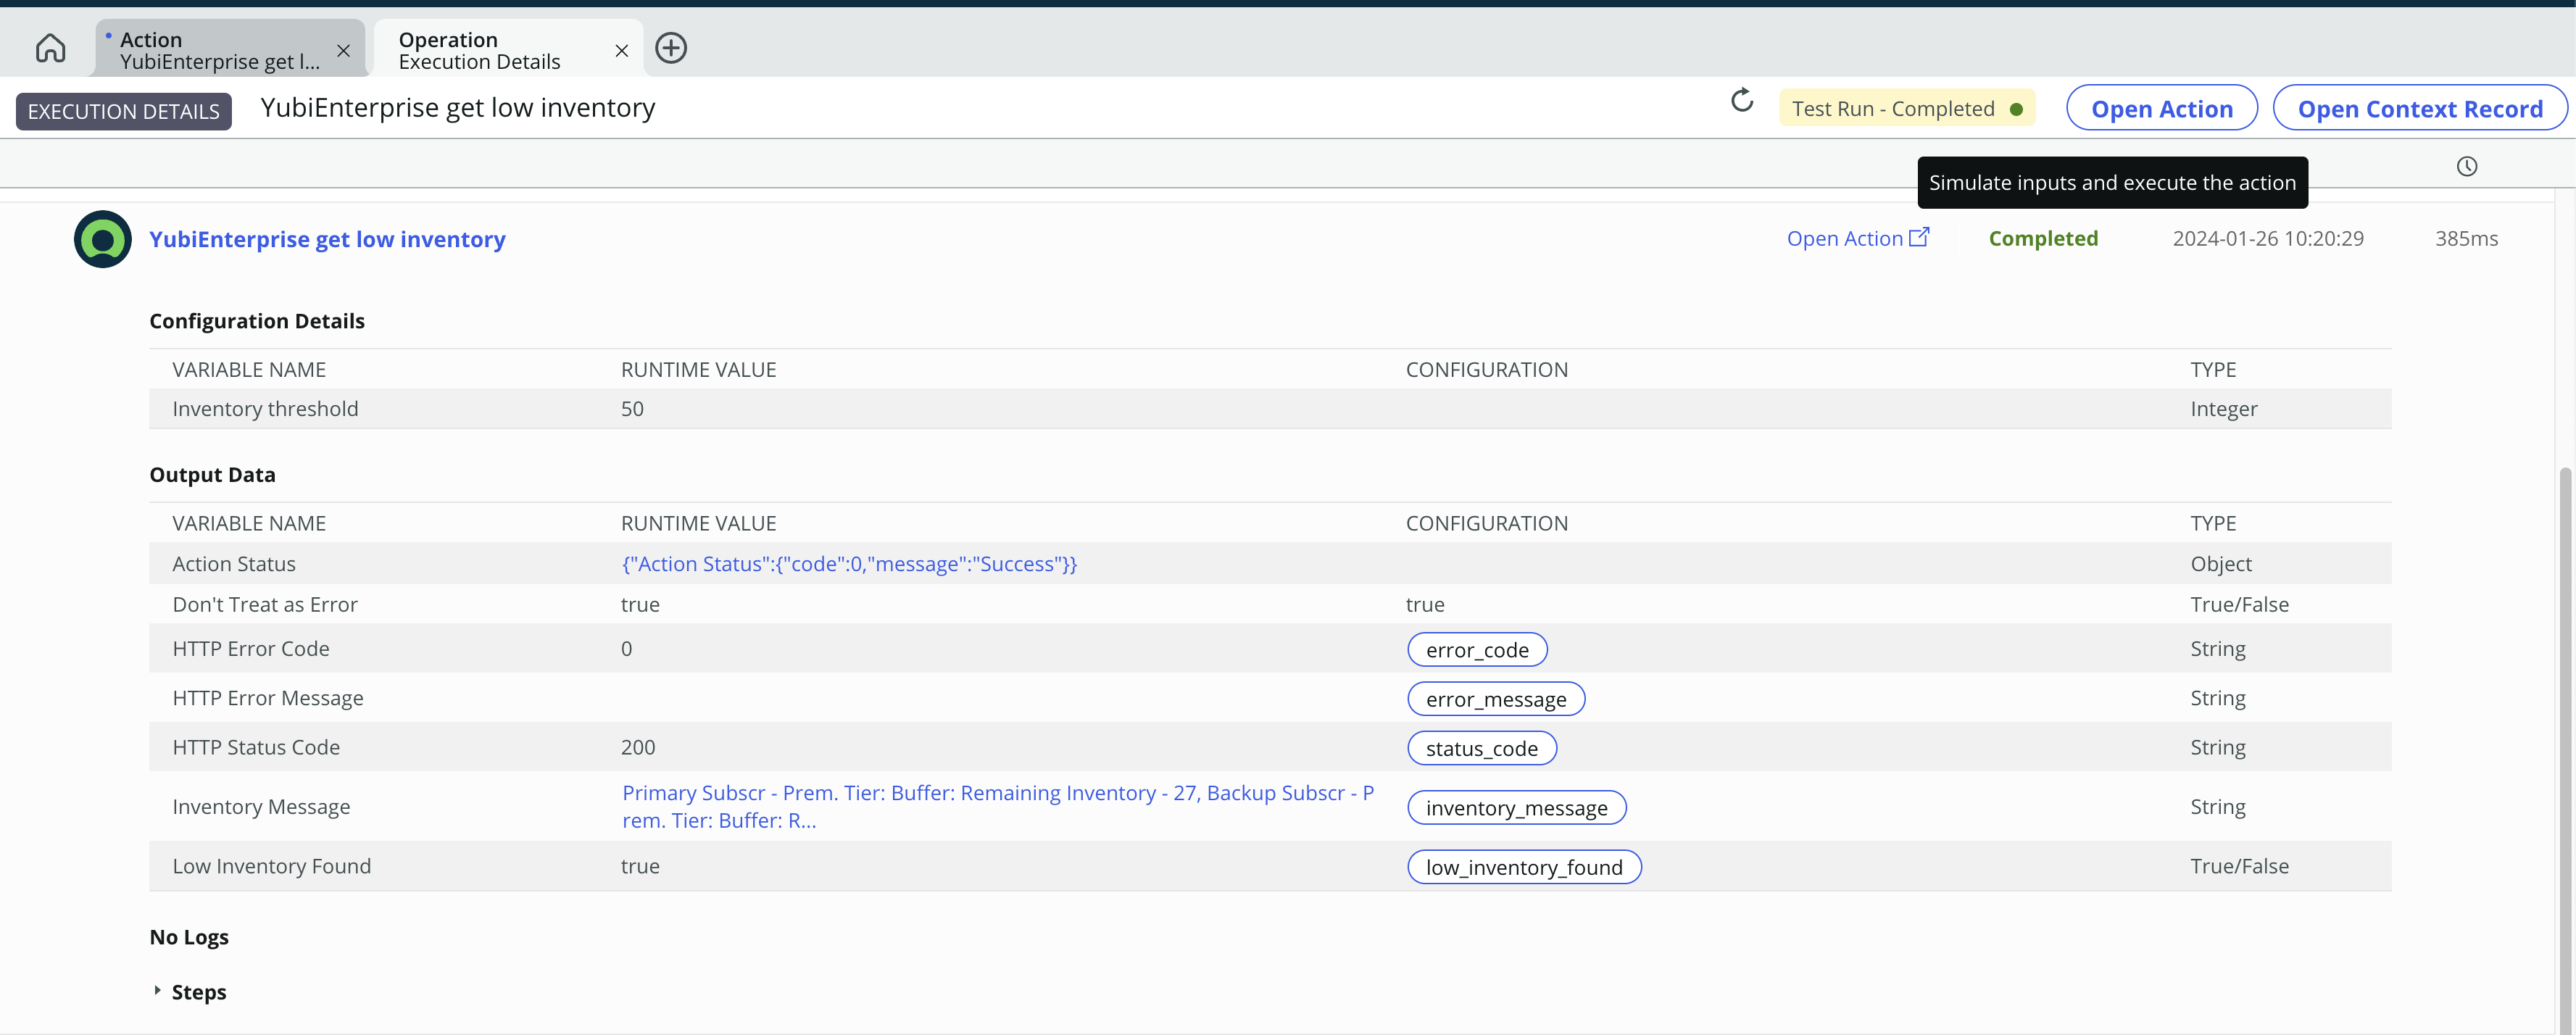
On the execution details screen, scroll until you see the Output Data section. The HTTP Status Code should be 200. If the response was not 200, take a look at the tips above, check the error message output, or expand the Steps section at the bottom of the details screen to troubleshoot.
Below is an example of a successful outputs screen
Publish the action
If everything looks good, click the Publish button at the top of the action menu to make the action available for all flows.
Create monitoring flow
For this next step, we will create a flow that will continuously run in your ServiceNow instance to monitor for any inventory buckets that have fallen below your specified threshold.
Unlike the previous flows that we have configured, this one will run every day on a timer vs being triggered by a service request.
If any of your inventory buckets are found to have fallen under your threshold, a new incident will be opened for your team to investigate, and to either work with Yubico if you want to add additional keys to your inventory, or to cutover to your buffer bucket (if you are leveraging a YubiEnterprise subscription).
Flow properties
On the ServiceNow home screen, search for flow designer.
Click Flow Designer, a new window should open.

Once the Flow Designer page opens, click the Create new button, then select Flow.

A menu will appear to configure the action's properties. Use the following values to initialize your action.
- Flow name: YubiEnterprise monitor inventory
- Description: Flow to monitor for low YubiEnterprise inventory
- Application: YubiEnterprise Delivery App
- Use the defaults for the remaining properties
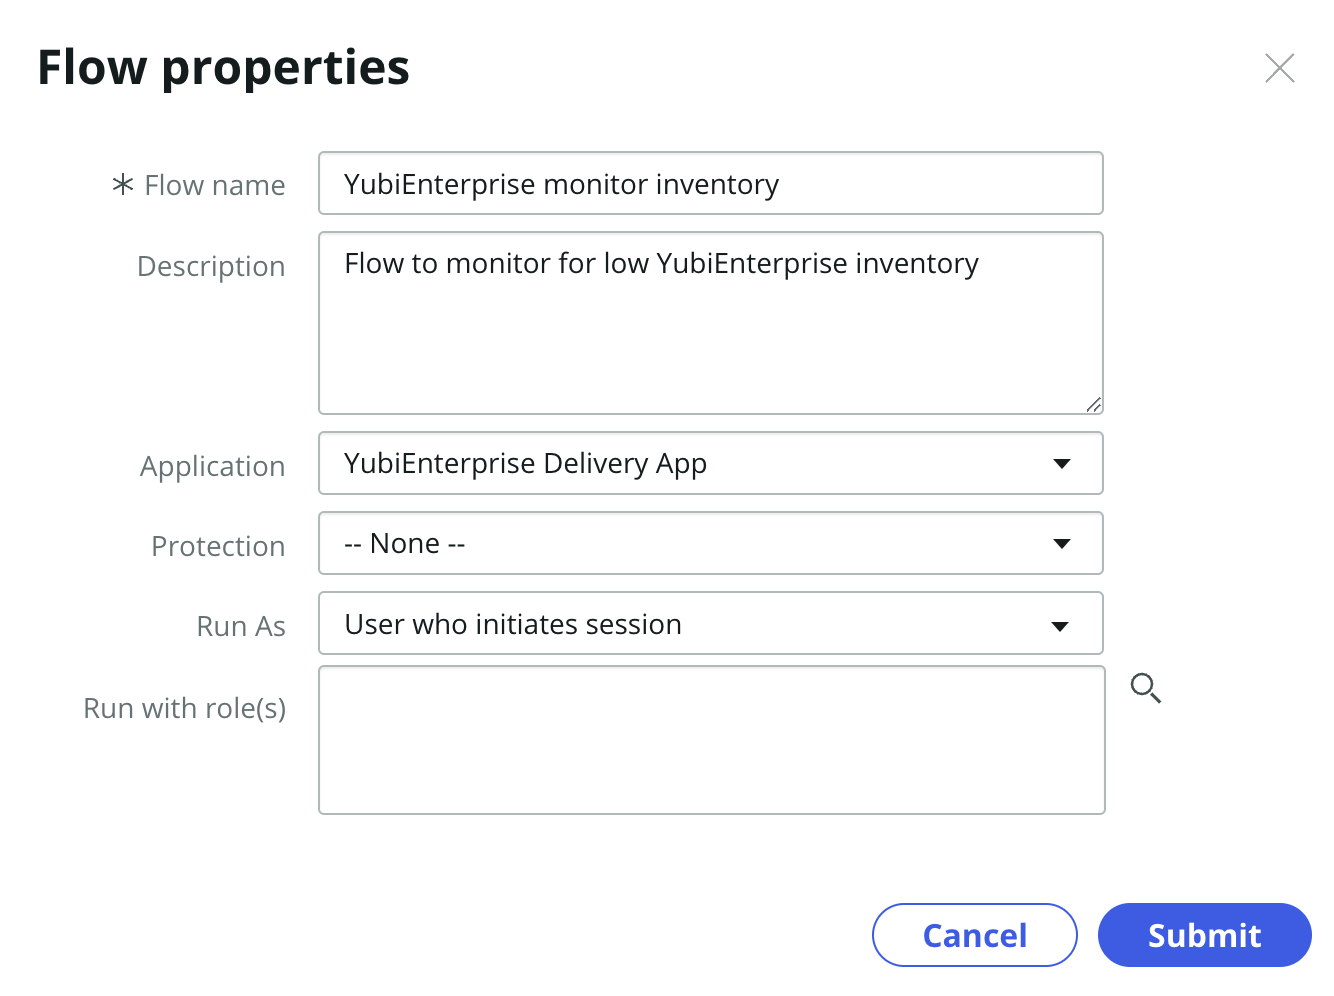
Click Submit.
Add flow trigger
Next we're going to add a trigger for the flow. As mentioned previously, this flow will run automatically once a day to check your current inventory levels.
First, click the + Add a trigger button.

A menu should appear to search for a trigger. Search for daily and select Daily. This option can also be found in the Scheduled category.
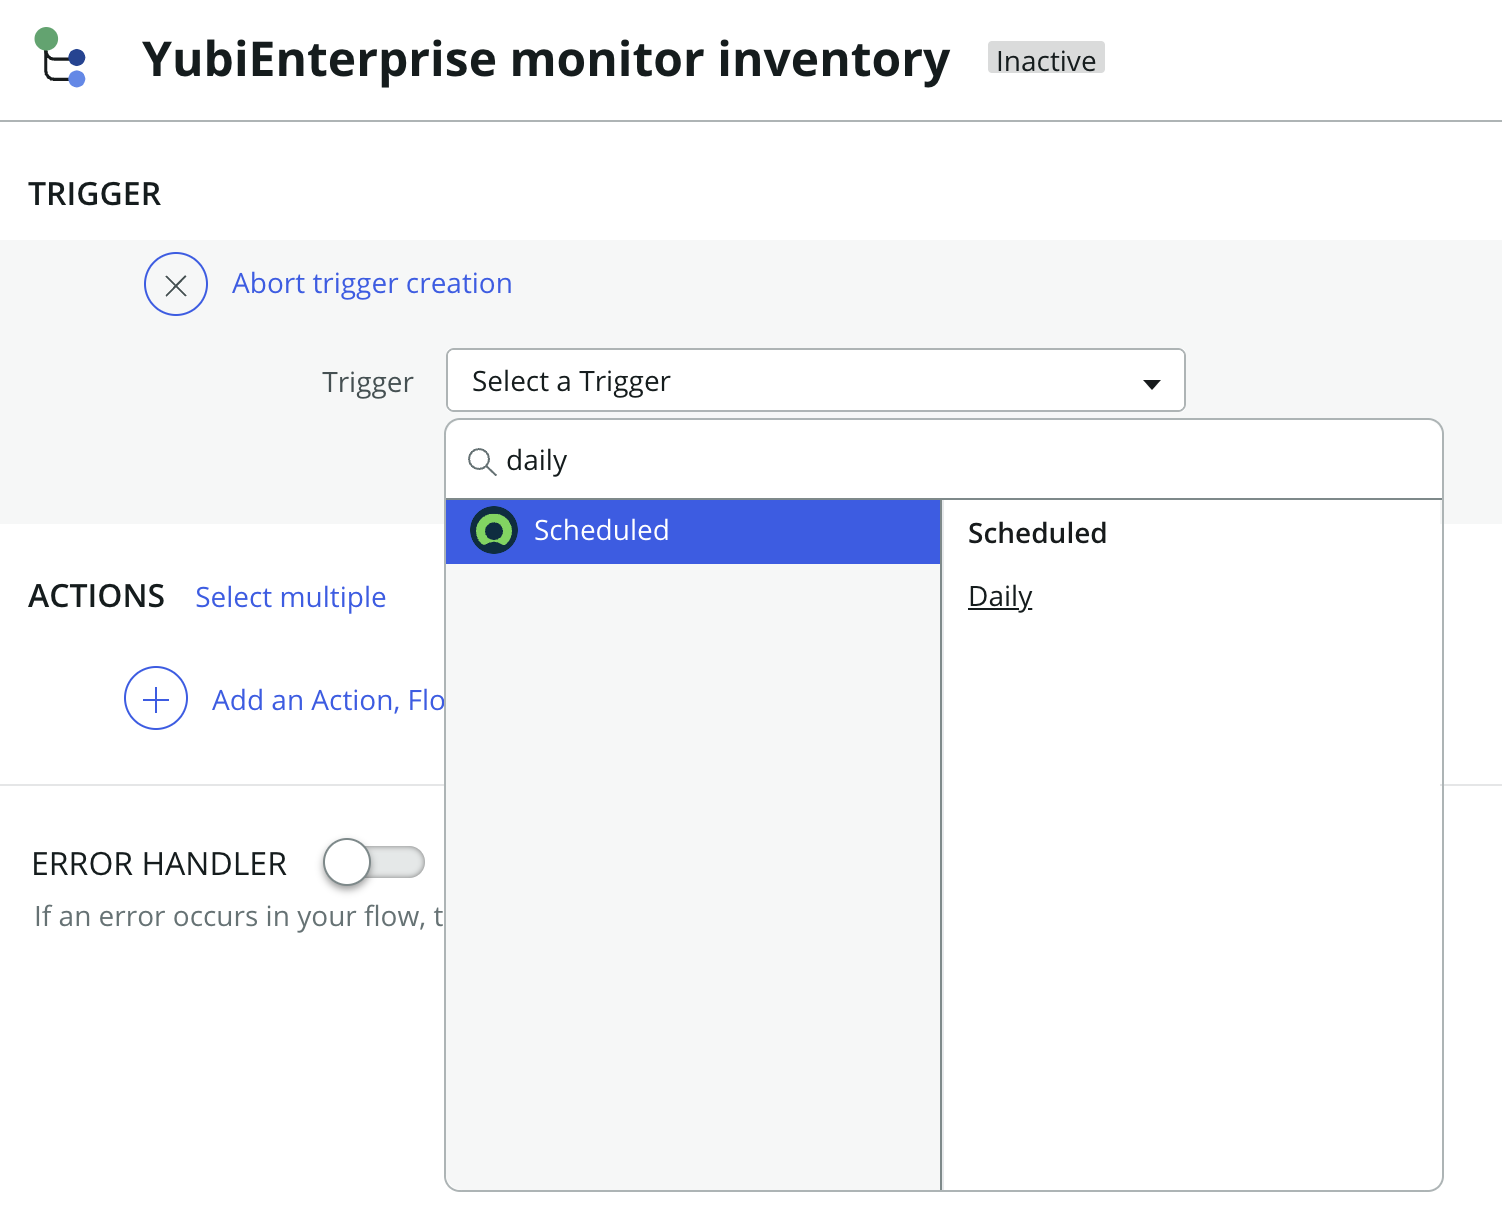
When prompted for the time, enter your desired time for the flow to trigger. For our example, we will set the flow to trigger at 13:00:00.
Once configured, press Done.
Add the action
Next we're going to add the action that was configured earlier on this page.
First click the + Add an Action, Flow Logic, or Subflow button.
Next click Action. When the menu appears, search for yubienterprise get low inventory, and select YubiEnterprise get low inventory.
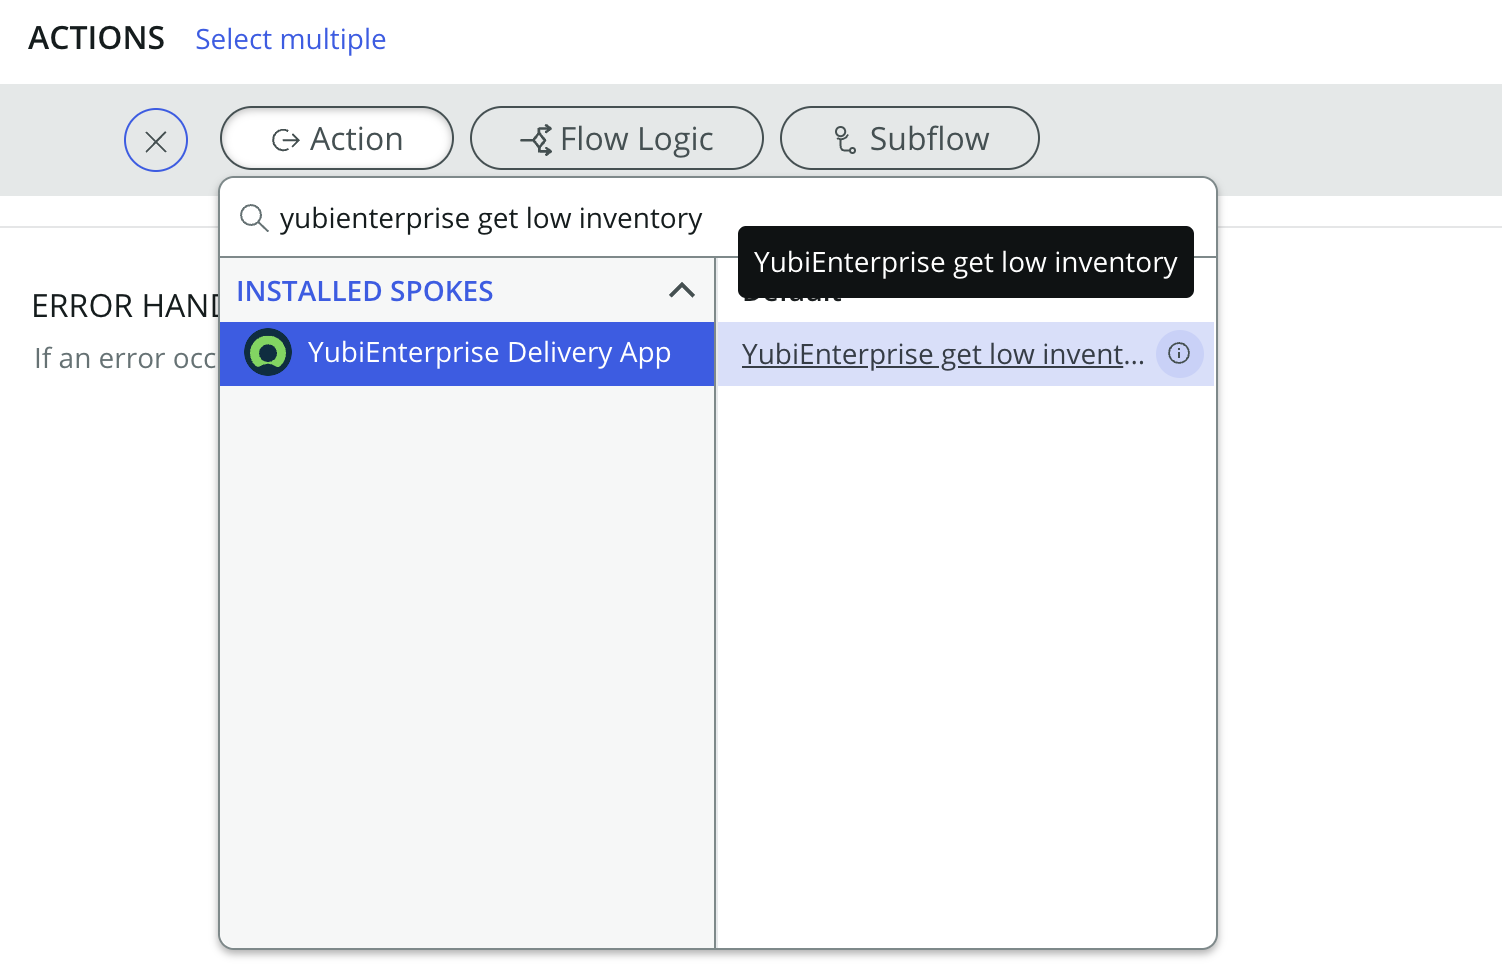
From here we are going to add our inventory threshold to the action.
Enter your threshold into the YubiEnterprise get low inventory action. An example of this configuration can be found below.

Click Done
Evaluate the low inventory flag
Now that we have received details about our current inventory, let's use the result of the previous action to see if an incident should be opened.
First, we're going to add a conditional check to see if the Low Inventory Found flag was set to true
Under the Set Flow Variables action click the + Add an Action, Flow Logic, or Subflow button.
Next, select Flow Logic.
Next, search for if, then select If.
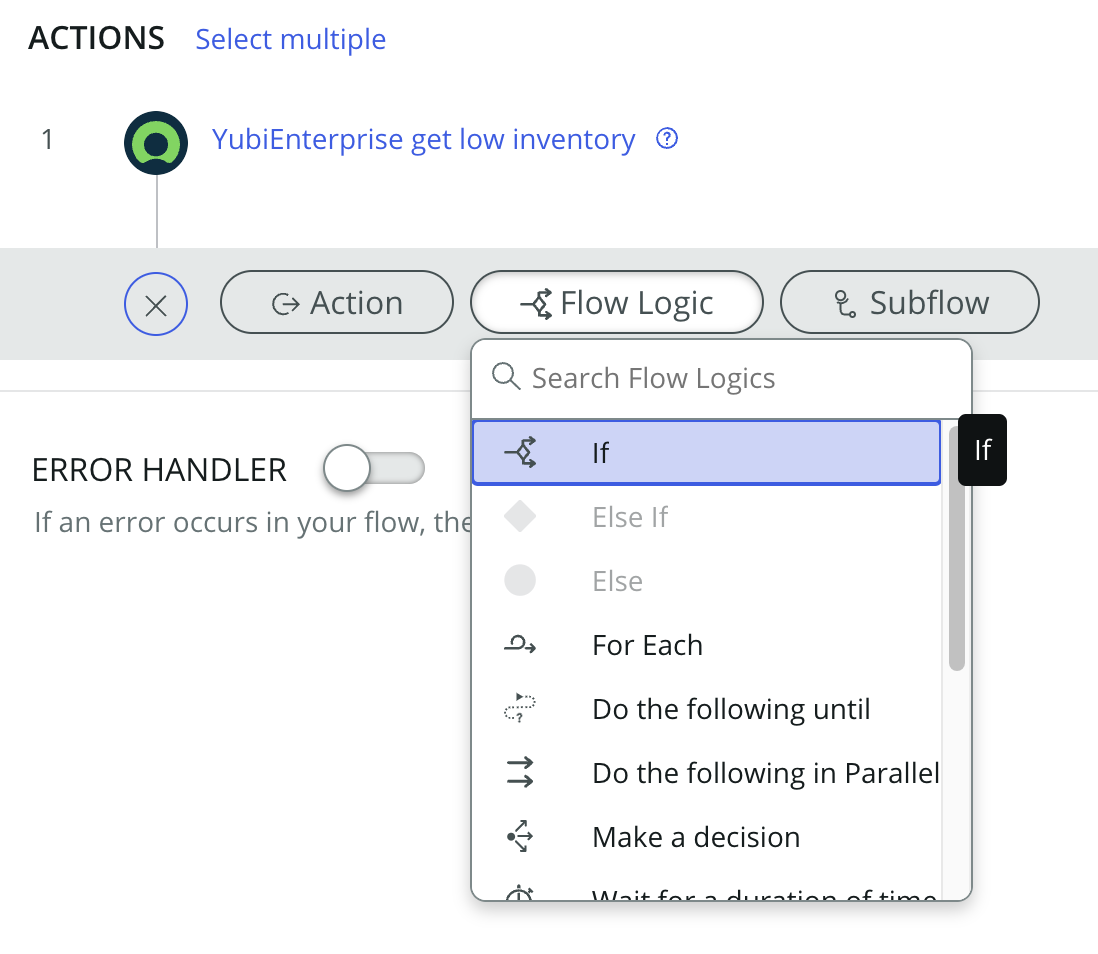
A new menu should appear. Configure it with the following values:
- Condition Label: Low inventory detected
- Condition 1
- Drag the Low Inventory Found flow variable into the first box
- Keep the condition as is
- In the third box, select True
Your final menu should resemble the image below.

When complete, click Done.
Under the new If step, click the then + button.
Click Action.
Search for create record. Select Create Record in the ServiceNow Core category.
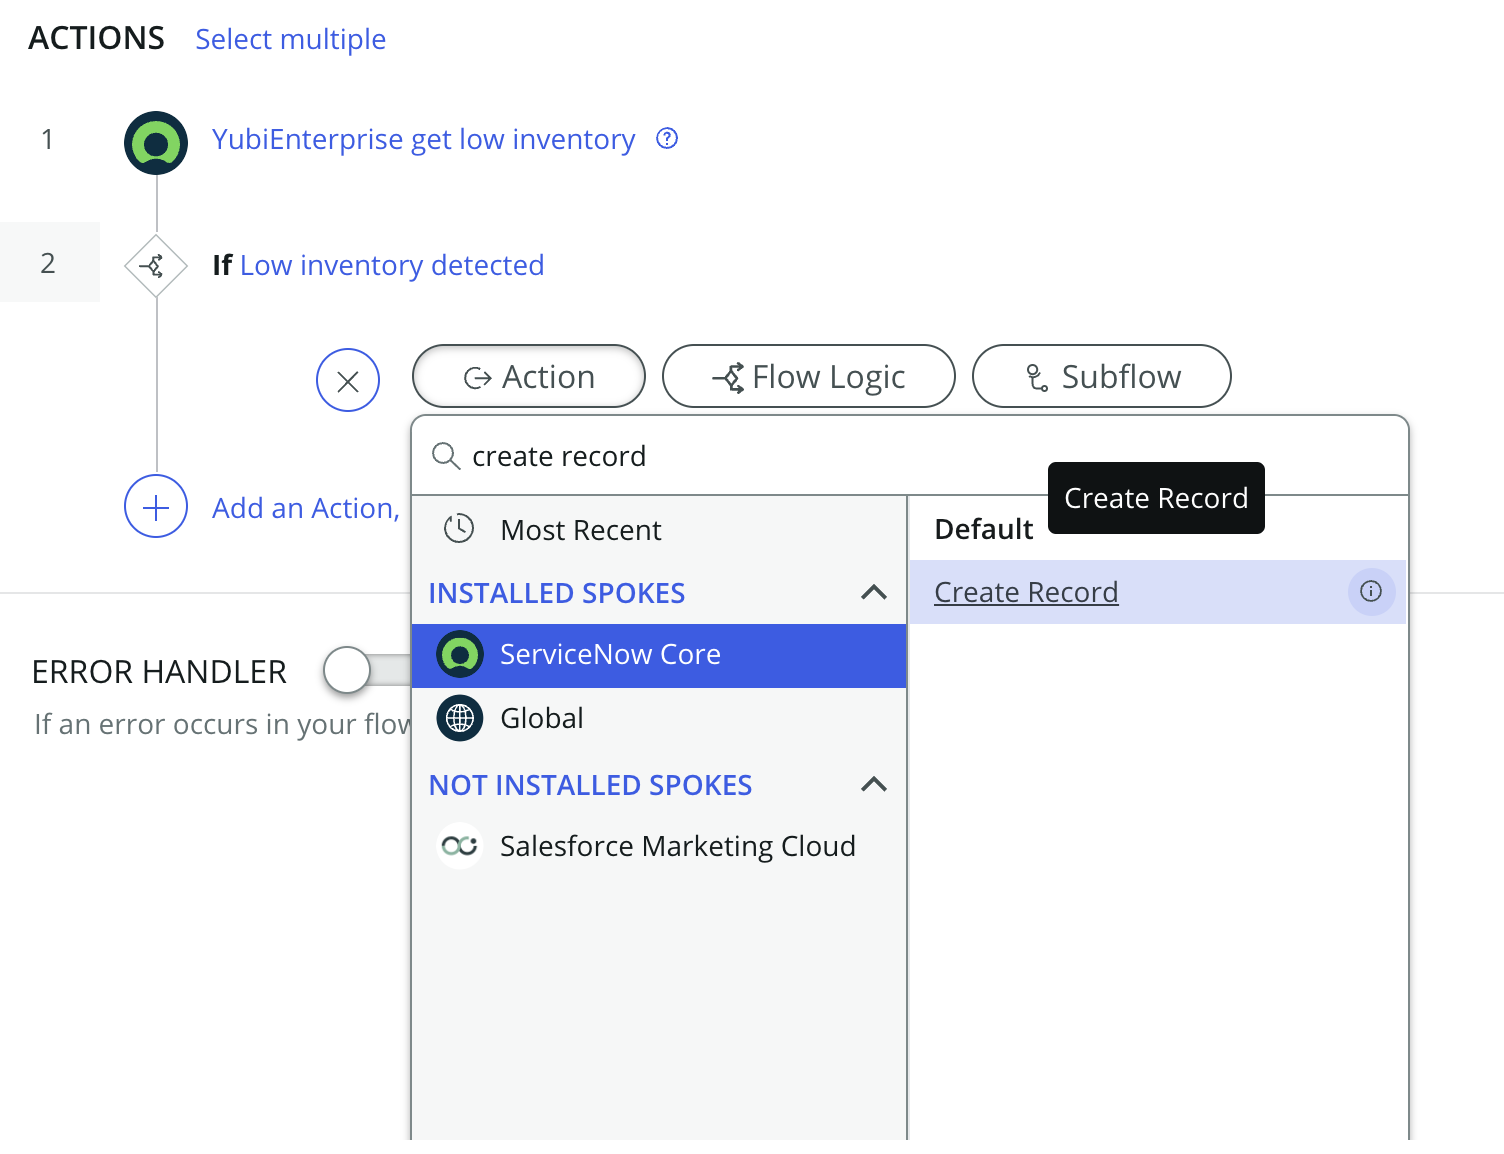
A new menu should appear. Configure it with the following values:
- Table: Select Incident [incident]
- Click the Add field value button 2 times. Add the following fields and values
- Short description: YubiEnterprise Inventory Low
- Description: The following inventory buckets have low inventory: [Add data pill for Inventory Message]
Your configurations should look like the image below.

When complete click Done.
At this point, all of the steps of the flow have been configured. Your flow should resemble to the image below
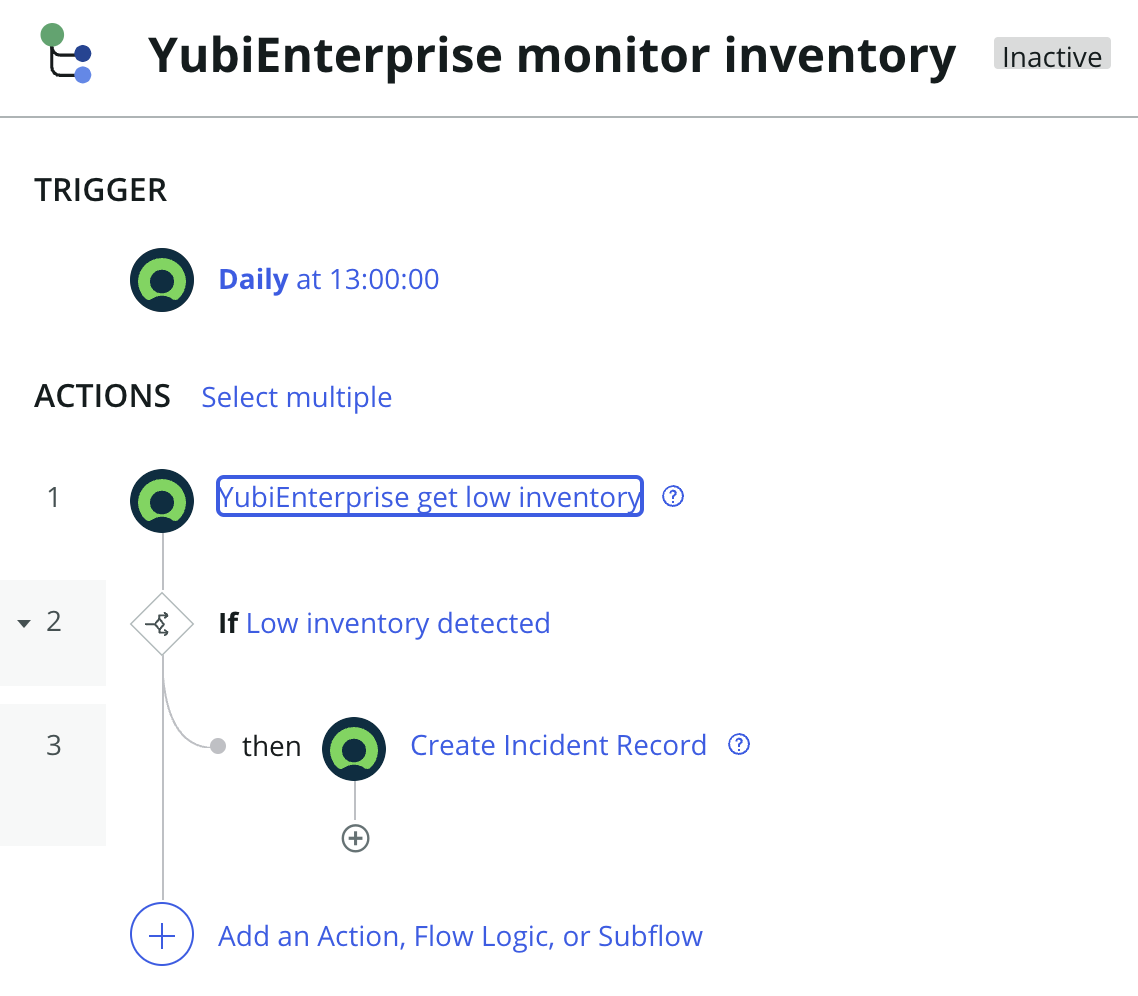
Click the Save button at the top of the screen. Once the flow is done saving click Activate.
Test the solution
To ensure that the flow is functioning correctly, we can test our current configurations. As stated above, you should run the test multiple times in order to evaluate the following scenarios:
- Threshold below all of your inventory buckets
- Threshold above one or all of your inventory buckets
At the top of your screen, click the Test button

After the pop-up menu appears, click Run Test.
Wait for the flow to complete.
Below are examples of the incident table, and incident details for a flow test where there were items found in the inventory below our specified threshold.

