Okta
In this step we will configure the custom ServiceNow flow to orchestrate the steps required to perform FIDO Pre-reg. This step assumes that you have already configured the catalog item, and the various actions for both the YubiEnterprise, and Okta APIs.
Flow properties
On the ServiceNow home screen, search for flow designer.
Click Flow Designer, a new window should open.

Once the Flow Designer page opens, click the Create new button, then select Flow.

A menu will appear to configure the action's properties. Use the following values to initialize your action.
- Flow name: YubiEnterprise Okta Pre-reg Flow
- Description: Create a new FIDO Pre-reg YubiKey shipment with an Okta credential
- Application: YubiEnterprise Delivery App
- Use the defaults for the remaining properties
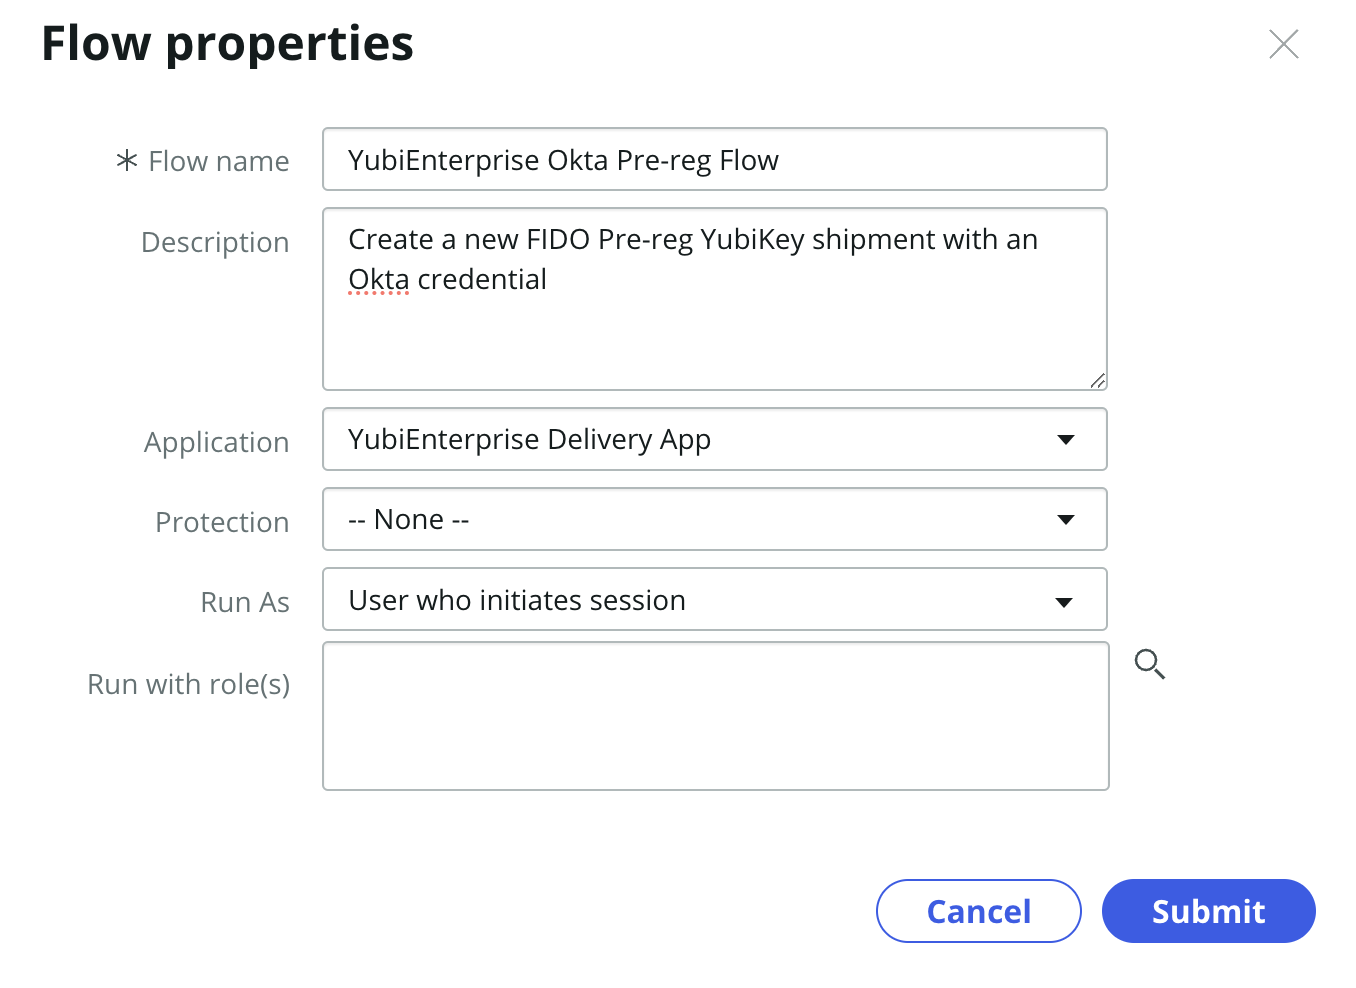
Click Submit.
Add flow trigger
Next, we're going to add a trigger. This will be the mechanism that will be used to start the flow. In our case, the trigger will be the custom catalog item that we built earlier.
First, click the + Add a trigger button.

A menu should appear to search for a trigger. Search for service catalog and select Service Catalog. This option can also be found in the Application category.

Once selected, press Done.
Add the form variables
Next we will ingest the custom form values that we created when the catalog item was created.
First click the + Add an Action, Flow Logic, or Subflow button.
Next click Action. When the menu appears, search for get catalog variables, and select Get Catalog Variables.

Once the new menu appears, drag the Request Item Record data pill from the Data table on the right into the Submitted Request.
For the Template input, search for yubikey and select YubiKey - Pre-reg (this will refer to the custom catalog item template that we previously created).
Use the right facing arrow to move the following fields to the column on the right
- first_name
- last_name
- organization_email
- personal_email
- phone_number
- street_address
- apt_or_unit
- city
- region
- postal_code
- country
- is_the_user_receiving_their_first_yubikey_or_a_replacement
- select_a_yubikey_model
Your form variables menu should look like the example below.
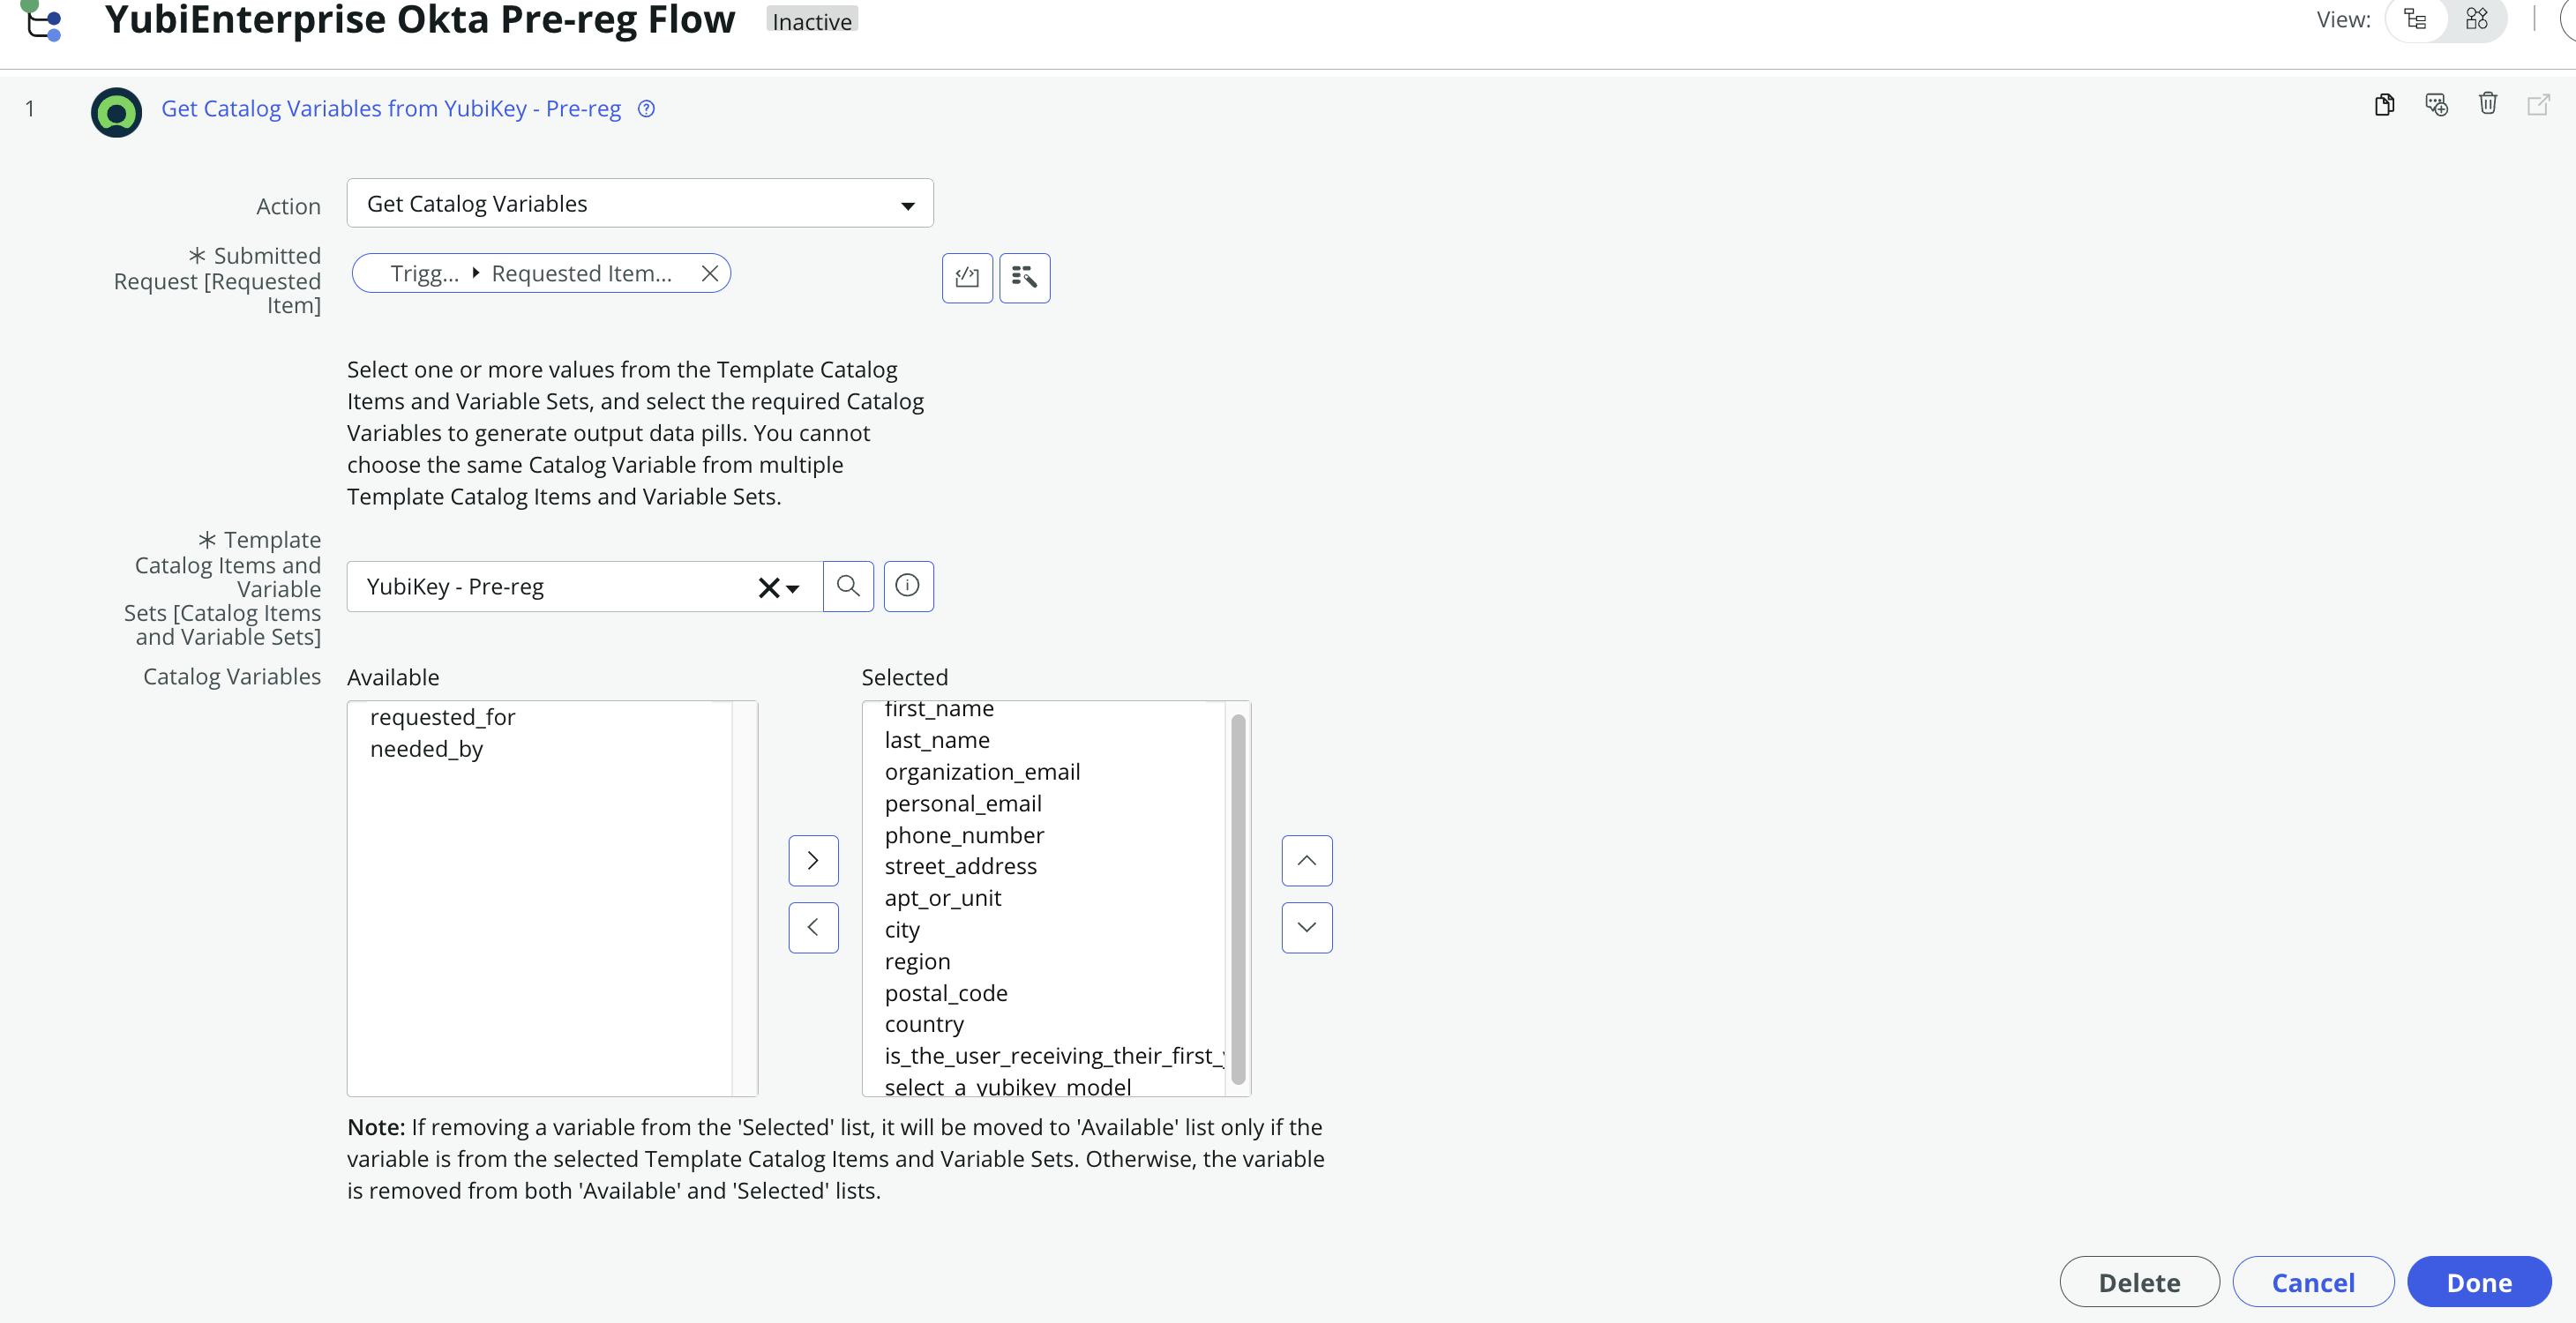
Once ready, press Done.
Add the Read Okta User action
Next we're going to make a call to the action to get the user's ID from Okta.
First click the + Add an Action, Flow Logic, or Subflow button.
Next click Action. When the menu appears, search for okta read user, and select Okta Read User.
Next we're going to map the recipient email from the form to the user email input for the Okta Read User action.
Use the table below to correlate the correct data pill, to the action input.
| Label | Section > Data pill or default value |
|---|---|
| User Login | Get Catalog Variable > organization_email |
Your action input mappings menu should look like the example below.

Click Done
Add the YubiEnterprise Transport/Signing Keys action
Next we're going to make a call to the YubiEnterprise console in order to get Yubico's public transport and signing keys.
First click the + Add an Action, Flow Logic, or Subflow button.
Next click Action. When the menu appears, search for yubienterprise, and select YubiEnterprise Transport/Signing Keys.
No inputs should be needed for this step.
Click Done
Add the Okta Create Enrollment action
Next we're going to make a call to the Okta Enrollment API in order to begin the FIDO Pre-reg ceremony.
First click the + Add an Action, Flow Logic, or Subflow button.
Next click Action. When the menu appears, search for okta create enrollment, and select Okta Create Enrollment.

Next we're going to map information about the user to create a new FIDO Pre-reg enrollment against the Okta API.
Use the table below to correlate the correct data pill, to the inputs of the action.
| Label | Section > Data pill or default value |
|---|---|
| User ID | Okta Read User > User ID |
| Fulfillment Provider | yubico |
| RP ID | Enter the domain of your Okta tenant (omit any protocol or path values). E.x. yubico-test.okta.com |
| Yubico Transport Keys | YubiEnterprise Transport/Signing Keys action > Transport Keys |
Your action input mappings menu should look like the example below.

Click Done
Add the YubiEnterprise create shipment (Pre-reg) action
Next we're going to make a call to the YubiEnterprise API in order to create the YubiKey shipment.
First click the + Add an Action, Flow Logic, or Subflow button.
Next click Action. When the menu appears, search for yubienterprise create, and select YubiEnterprise create shipment (Pre-reg).
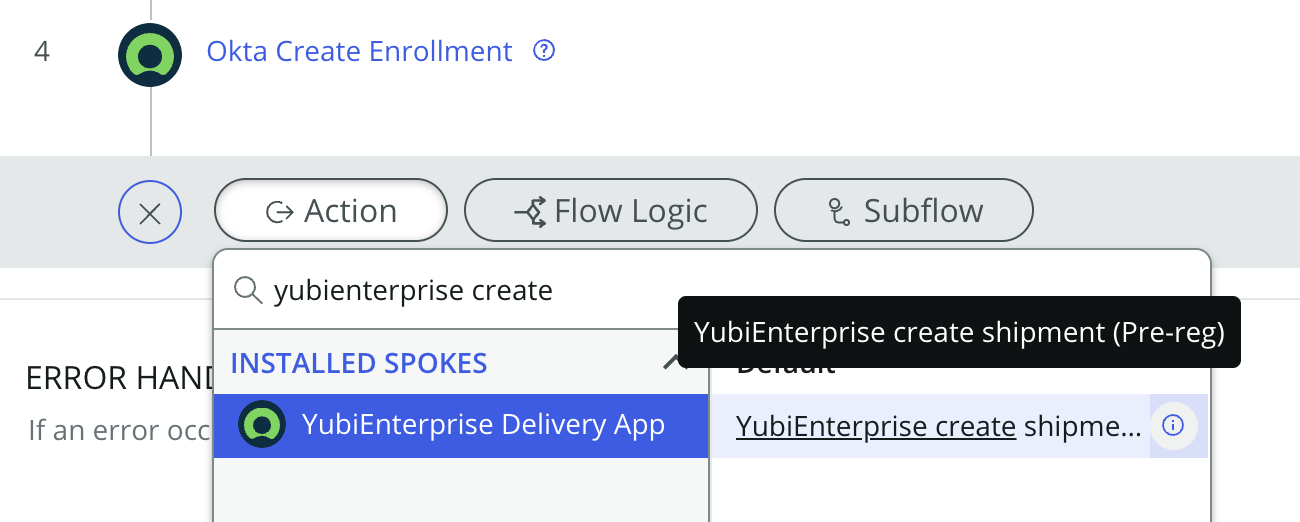
Next we're going to map the shipping and credential information to the action in order to create the shipment.
Use the table below to correlate the correct data pill, to the inputs of the action.
| Label | Section > Data pill or default value |
|---|---|
| Company | Your company name |
| Delivery Email | Get Catalog Variable > personal_email |
| First name | Get Catalog Variable > first_name |
| Last name | Get Catalog Variable > last_name |
| Phone number | Get Catalog Variable > phone_number |
| Street Line 1 | Get Catalog Variable > street_address |
| Street Line 2 | Get Catalog Variable > apt_or_unit |
| City | Get Catalog Variable > city |
| Region | Get Catalog Variable > region |
| Postal Code | Get Catalog Variable > postal_code |
| Country Code | Get Catalog Variable > country |
| Product ID | Get Catalog Variable > select_a_yubikey_model |
| Inventory Product ID | Get Catalog Variable > is_the_user_receiving_their_first_yubikey_or_a_replacement |
| Customization ID | Enter your YubiEnterprise customization ID - This can be found in the YubiEnterprise console, or you can work with your Yubico contact |
| Quantity | 1 |
| PIN Request JWE | Okta Create Enrollment > PIN Request JWE |
| Credential Request JWE | Okta Create Enrollment > Credential Request JWE |
| Delivery Type | 1 |
Your action input mappings menu should look like the example below.
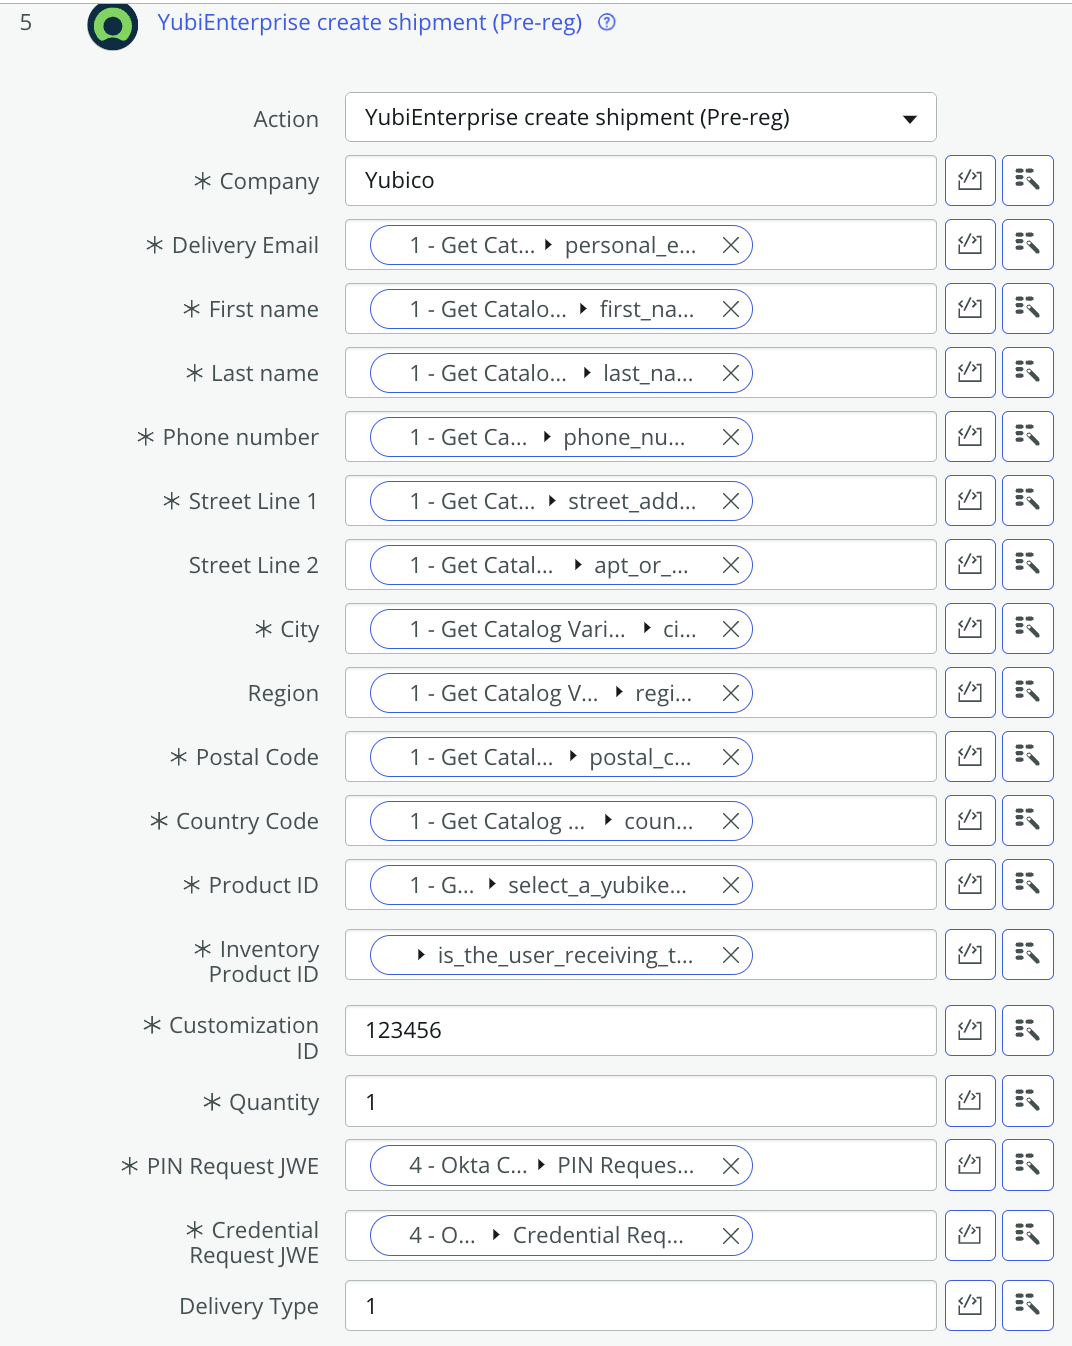
Click Done
Create flow variable
We will need to create a flow variable to keep track of the current shipment state ID. Perform the steps below to create a flow variable.
- Click the 3 dots on the top right of the screen
- Click Flow Variables
- Click the small + button on the right of the pop-up menu
- Set the Label to Current shipment state ID.
- Set the Type to Integer
Your final settings should resemble the image below.

When complete, click the X button on the top right of the pop-up.
If you scroll to the top of the Data window on the right side, you should see your new flow variable.
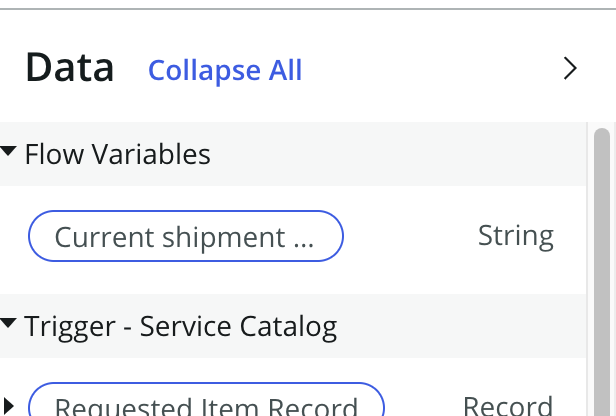
We will now set the flow variable using the Shipment State ID from the YubiEnterprise create shipment (Pre-reg) action.
At the bottom of the flow click the + Add an Action, Flow Logic, or Subflow button.
Next, select Flow Logic.
Next, search for set, then select Set Flow Variables.
A new menu will appear. Begin by clicking the + button in the new menu.
In the Name field, select the flow variable Current shipment state ID.
Drag the Shipment State ID value from the Data window on the right, in the YubiEnterprise create shipment (Pre-reg) section.
Your resulting menu should resemble the image below.

When complete, click Done.
Create daily cron job
Next we will create a cron job that will continuously monitor the shipment that was previously created in the flow. The YubiEnterprise API does not provide webhooks, so we will need to continuously poll the API to catch any changes.
Due to the physical and logistical nature of a shipment, the state doesn't undergo rapid changes in a single day. Due to these considerations, we recommend that you poll the API once or twice a day.
You may also consider adding a check that occurs ~15 mins after the initial creation of a shipment to ensure that all of the data was properly validated.
This example focuses only on the mechanism that runs once a day at a designated time - but the same foundational steps can be used to create a variety of timers based on your use case.
First we will create a conditional loop that will run until the shipment has entered into a state where the PIN and credential responses are available, indicated by a Shipment State ID of 103 or 104.
Follow the steps below to create the conditional loop.
- Click Add an Action, Flow Logic, or Subflow
- Click Flow Logic
- Select Do the following until

A new menu should appear. Configure it with the following values:
- Condition Label: FIDO Pre-reg response is available
- Condition 1
- Drag the Current shipment state ID flow variable into the first box
- Keep the condition as is
- In the third box, type 103
- Click the or button
- Condition 2
- Drag the Current shipment state ID flow variable into the first box
- Keep the condition as is
- In the third box, type 104
Your final menu should resemble the image below.

When complete, click Done.
Within the Do the following section we are going to add our timer using the instructions below:
- Click Add an Action, Flow Logic, or Subflow
- Click Flow Logic
- Select Wait for a duration of time
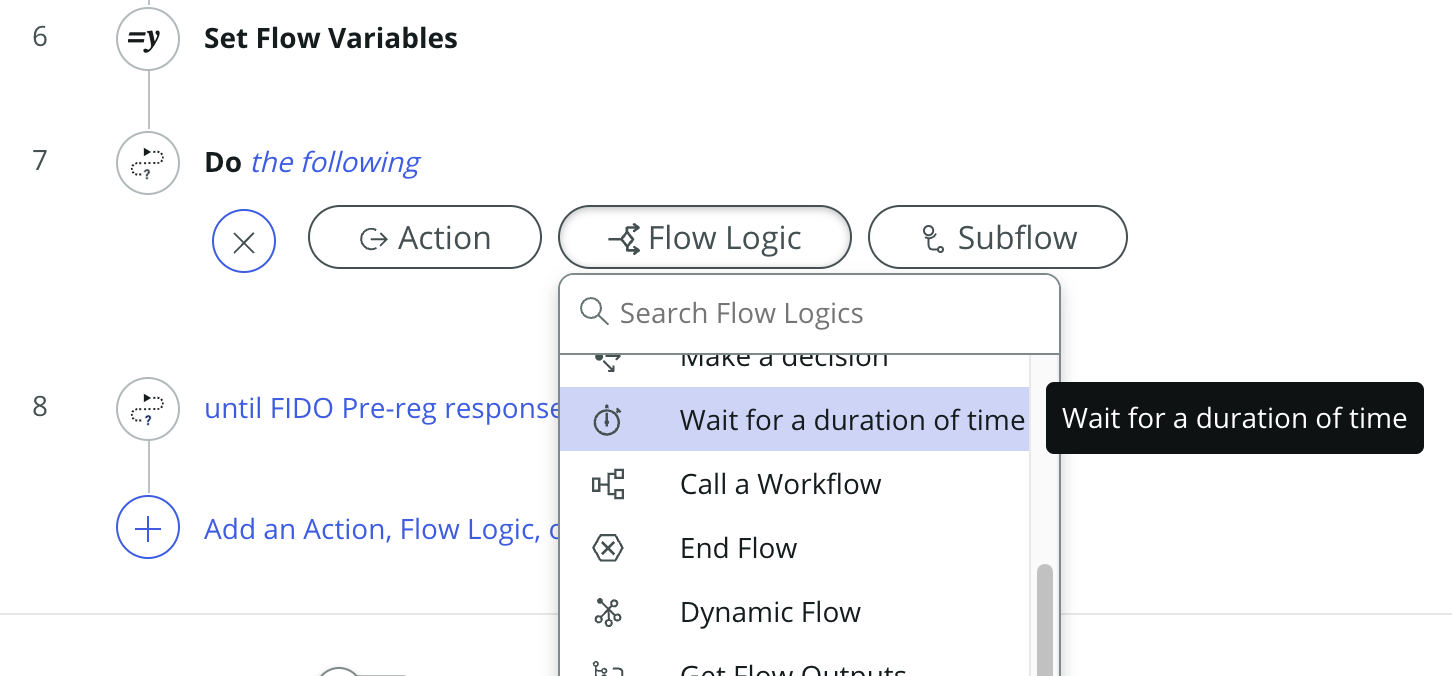
A new menu should appear. Configure it with the following values:
- Duration Type: Explicit duration
- Wait for: 24 h
- During the following schedule: 24 x 7
Your final menu should resemble the image below.

When complete, click Done.
Call the YubiEnterprise get shipment (Pre-reg) action
Next, we are going to call to the YubiEnterprise API to get details about the shipment.
We will begin by adding the YubiEnterprise get shipment (Pre-reg) action to the conditional loop.
Within the Do the following section we are going to add our custom action using the instructions below:
- Click the + button under the Wait step you just added
- Click Add an Action, Flow Logic, or Subflow
- Click Action
- Search for yubienterprise get, and select YubiEnterprise get shipment (Pre-reg).
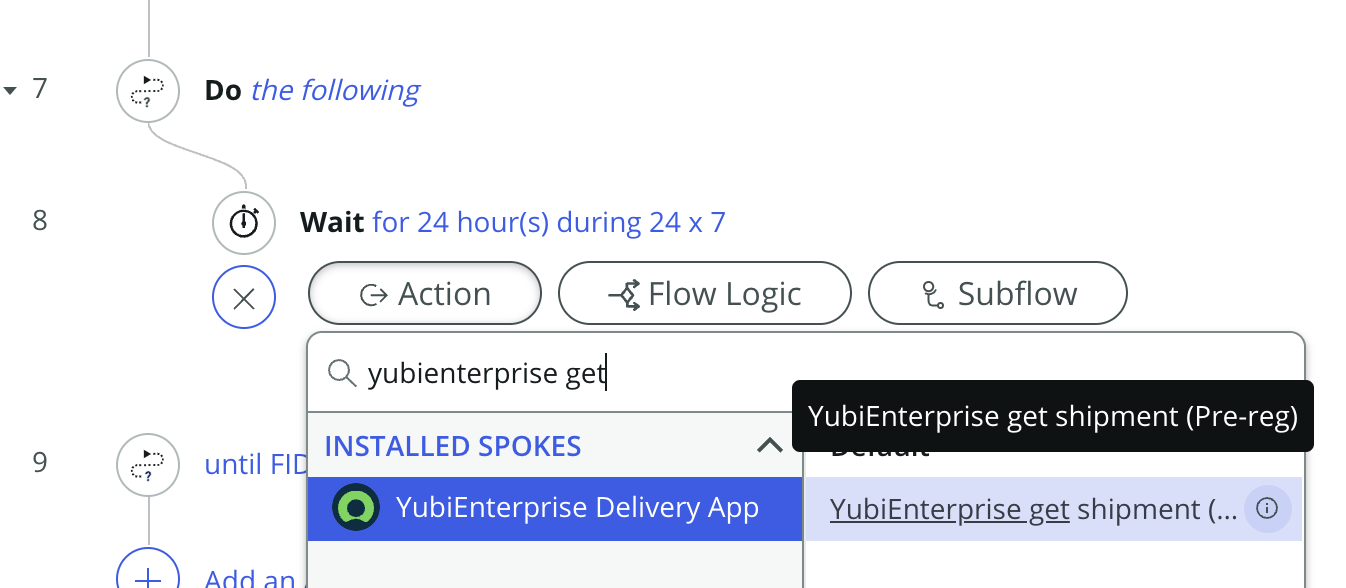
For the field Shipment ID, drag the Shipment Request ID data pill from the Data window, in the section titled YubiEnterprise create shipment (Pre-reg).

Next, we are going to update the flow variable for the Current Shipment State ID. This will help us understand if the PIN and credential response is available for processing.
First we'll start by setting the Flow Variable Current Shipment State ID to the updated state provided by the Get FIDO Pre-reg shipment action.
These steps should resemble the ones taken earlier on this page. Under the Get FIDO Pre-reg shipment action click the + Add an Action, Flow Logic, or Subflow button.
Next, select Flow Logic.
Next, search for set, then select Set Flow Variables.
A new menu will appear. Begin by clicking the + button in the new menu.
In the Name field, select the flow variable Current shipment state ID.
Drag the Shipment State ID value from the Data window on the right, in the Get FIDO Pre-reg shipment section.
Your resulting menu should resemble the image below.

When complete, click Done.
Call the YubiEnterprise get shipment (Pre-reg) action again
Next, we are going to call to the YubiEnterprise API to get details about the shipment again. This is due to ServiceNow not being able to provide values outside of the conditional loop.
We will begin by adding the YubiEnterprise get shipment (Pre-reg) action directly outside of the conditional loop.
Outside of the Do the following section we are going to add our custom action using the instructions below:
- Click the + button under the Wait step you just added
- Click Add an Action, Flow Logic, or Subflow
- Click Action
- Search for yubienterprise get, and select YubiEnterprise get shipment (Pre-reg).
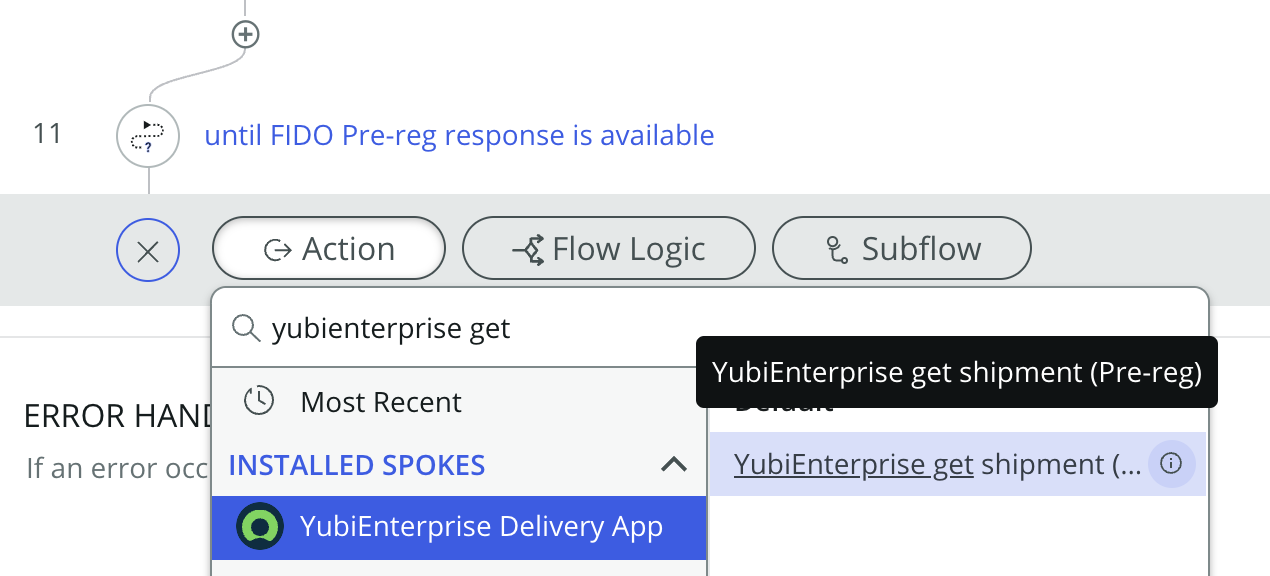
For the field Shipment ID, drag the Shipment Request ID data pill from the Data window, in the section titled YubiEnterprise create shipment (Pre-reg).
When complete, click Done.
Add the Okta Activate Credential action
Next we're going to make a call to the Okta Activation API in order to finalize the enrollment of a FIDO credential against Okta.
First click the + Add an Action, Flow Logic, or Subflow button.
Next click Action. When the menu appears, search for okta activate credential, and select Okta Activate Credential.
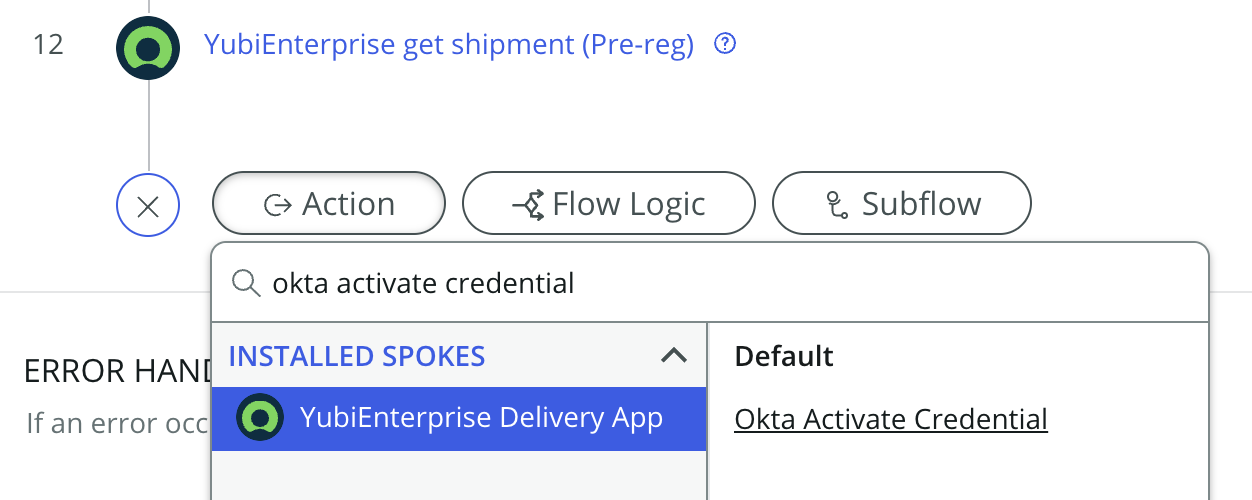
Next we're going to map the inputs from the previous actions into this card.
Use the table below to correlate the correct data pill, to the inputs of the action.
| Label | Section > Data pill or default value |
|---|---|
| PIN Response | 12 - YubiEnterprise get shipment (Pre-reg) > PIN Response |
| Credential Response | 12 - YubiEnterprise get shipment (Pre-reg) > Credential Response |
| Authenticator Enrollment ID | Okta Create Enrollment > Authenticator Enrollment ID |
| Fulfillment Provider | yubico |
| User ID | Okta Read User > User ID |
| Serial Number | 12 - YubiEnterprise get shipment (Pre-reg) > Serial Number |
| Version | 12 - YubiEnterprise get shipment (Pre-reg) > Firmware Version |
| Yubico Signing Keys | YubiEnterprise Transport/Signing Keys > Signing Keys |
Your action input mappings menu should look like the example below.
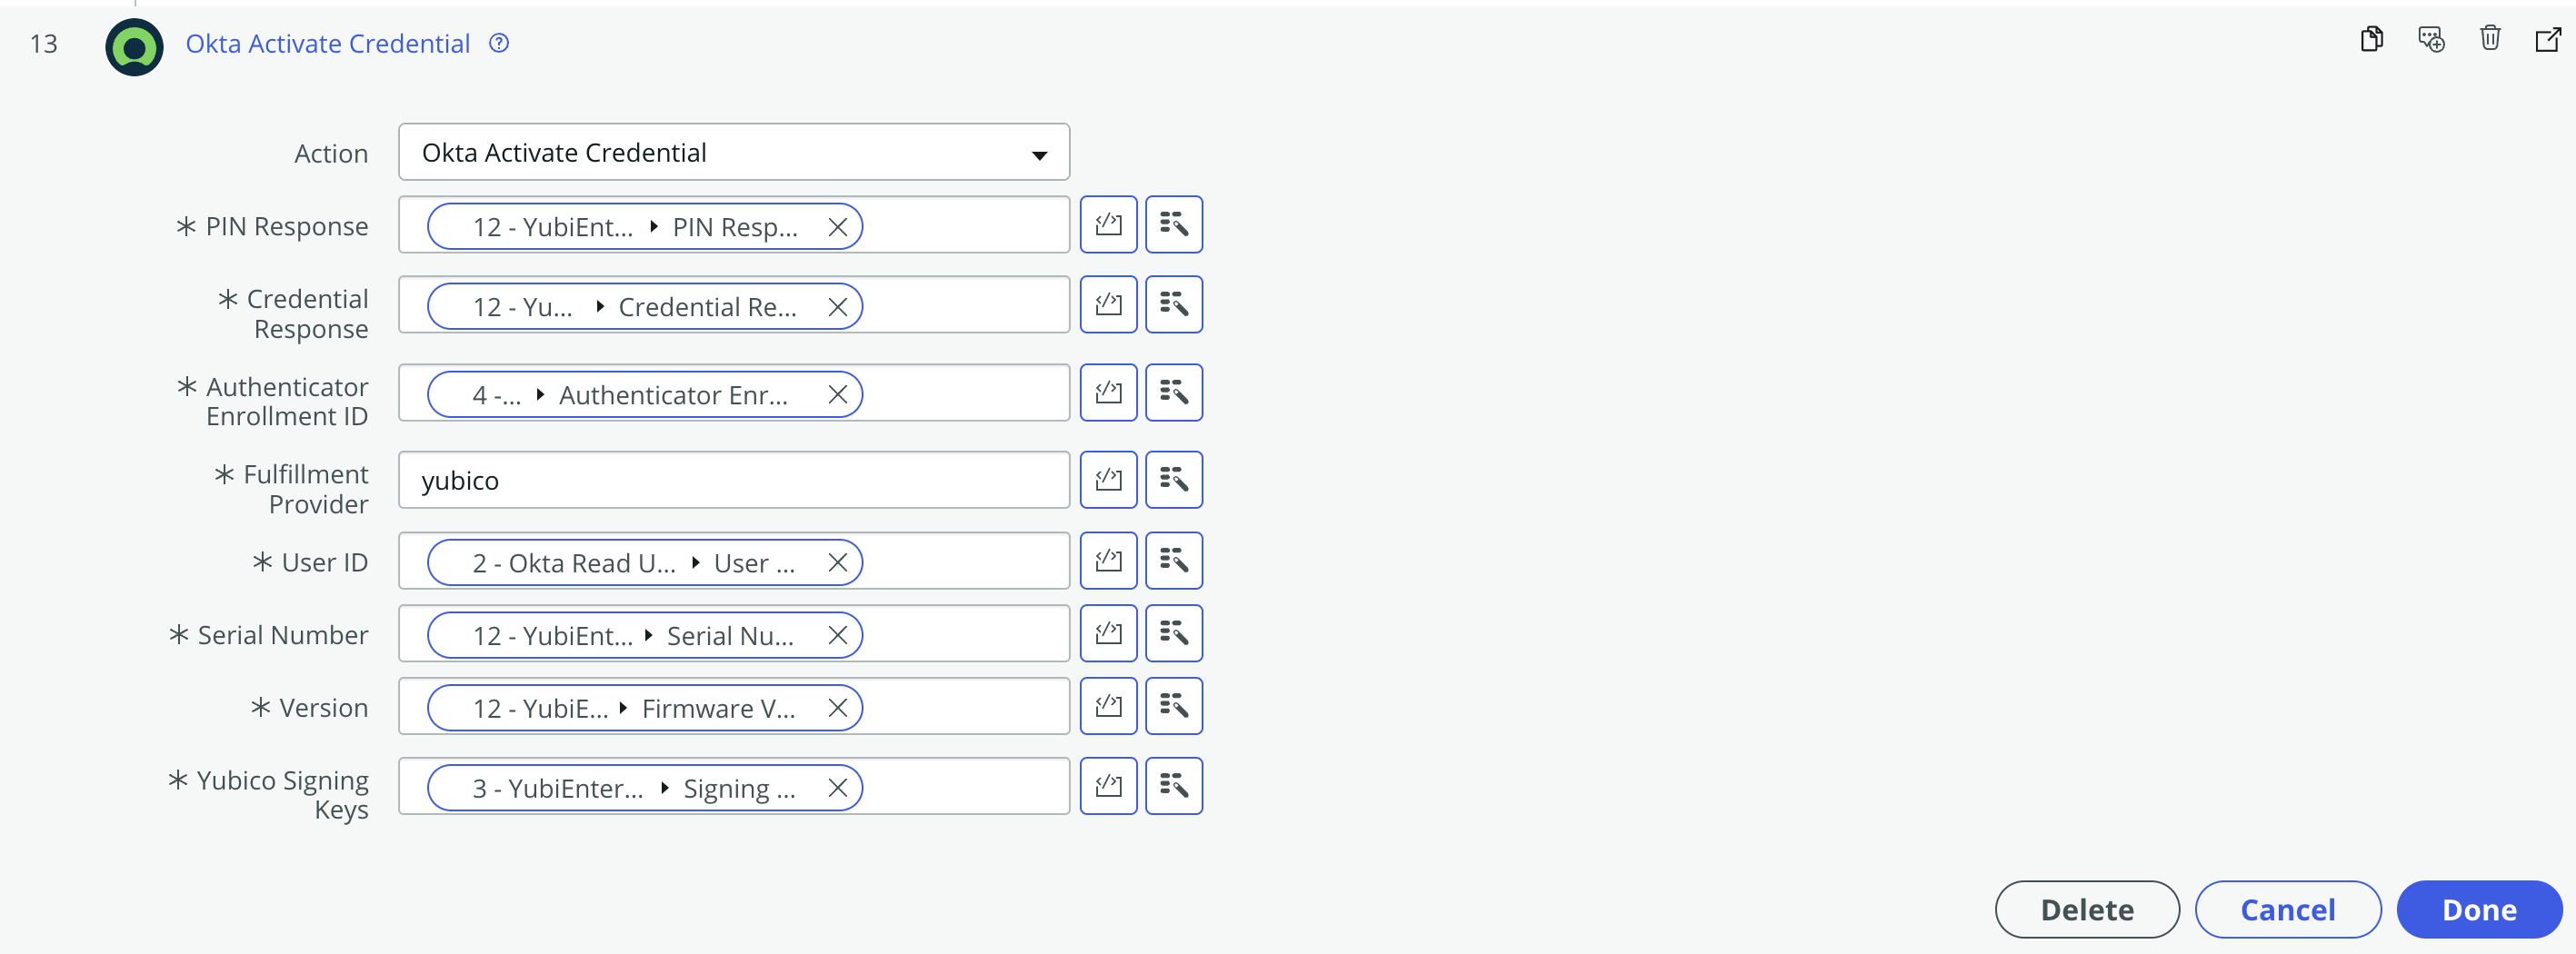
Click Done
Add an approval before sending the YubiKey PIN
The next step in the pre-reg cycle is to send the randomly generated YubiKey PIN to the user. Without the PIN, the user will not be able to use the YubiKey or the Okta credential that was pre-registered. At this stage, the admin (or manager of the user) should ensure that the key was correctly received by the intended user. Once this is confirmed (or additional identity proofing has been complete), the manager should approve this request to allow Okta to send the PIN to the user.
The steps below will highlight how to add an approval to this flow before sending out the PIN.
Click the + Add an Action, Flow Logic, or Subflow button.
Next click Action. When the menu appears, search for approval, and select Ask for Approval.
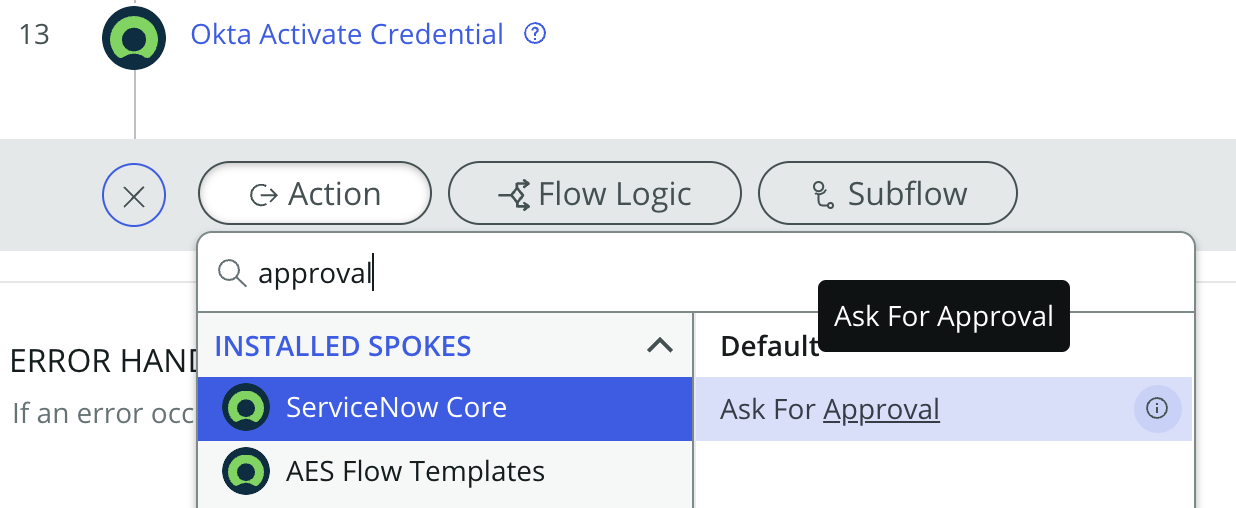
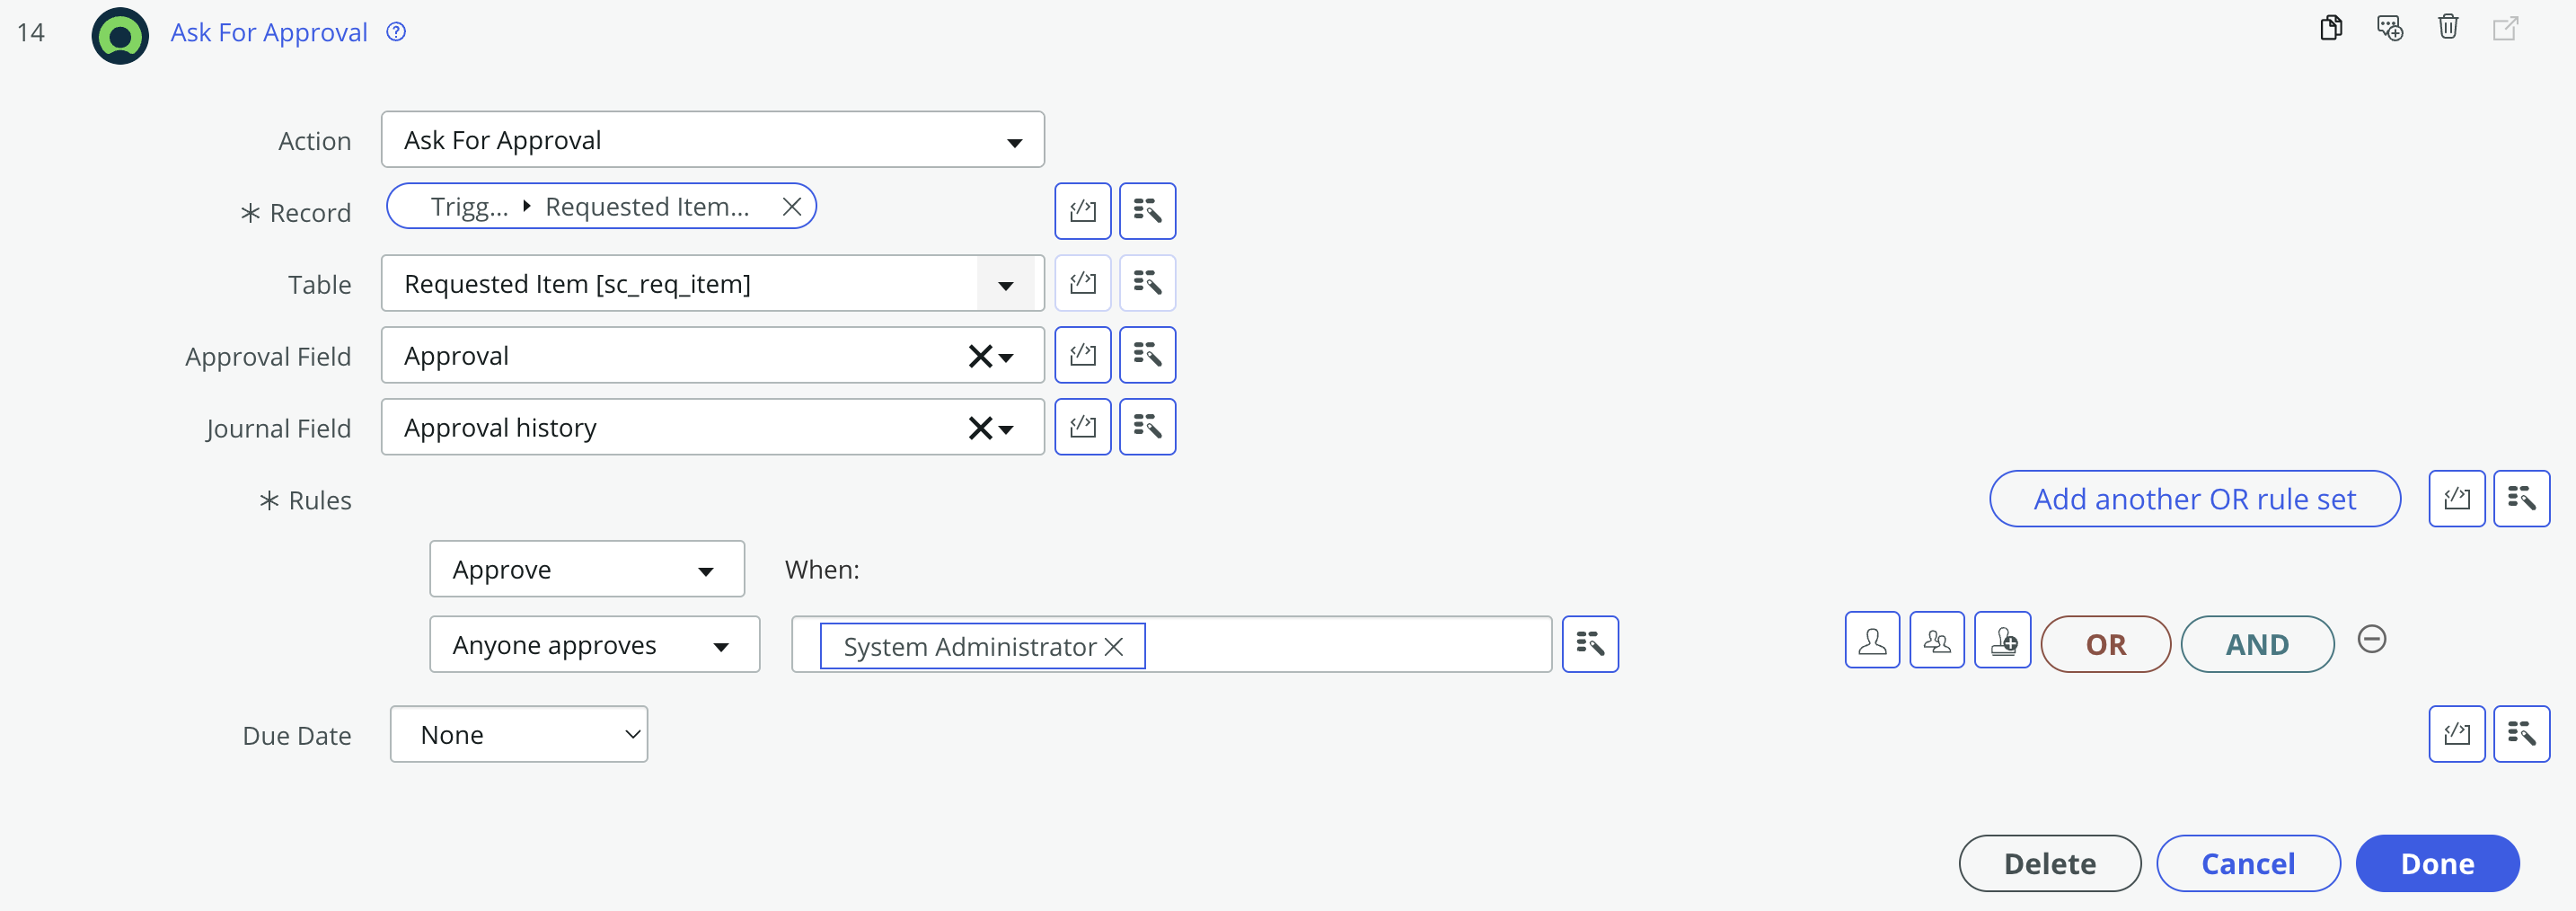
A configuration menu should appear. Populate the fields with the following values:
- Action: Ask For Approval
- Record: Drag the Requested Item Record data pill from the Data menu
- Table: (Auto-populated) Request item
- Approval Field: (Auto-populated) Approval
- Journal Field: (Auto-populated) Approval History
- Rules:
- Approve when
- Anyone approves
- Select the person or role who should grant the approval, in this case we are defaulting to the System Administrator
Your approval mappings menu should look like the example below.
Click Done
Next we are going to add a conditional statement to trigger an action if the request was approved.
Click the + Add an Action, Flow Logic, or Subflow button.
Next click Flow Logic button. When the menu appears and select if.
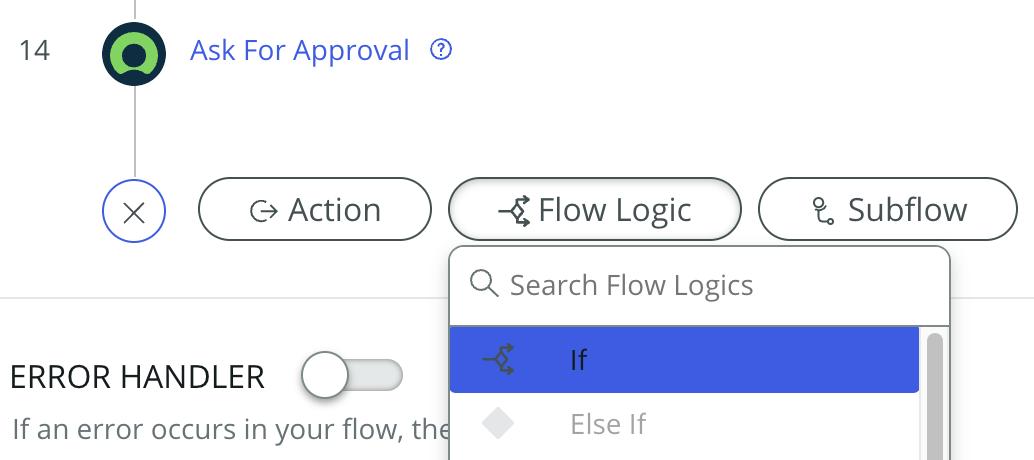
A configuration menu should appear. Populate the fields with the following values:
- Condition Label: If approved
- Condition 1:
- Drag the Approval State data pill from the Data menu, 14 - Ask for Approval section
- is
- Select Approved
Your conditional mappings menu should look like the example below.

Click Done
Add the Send PIN action
Lastly, we will add the action to send the PIN to the user. Be sure that this action is only placed within the approval conditional statement, otherwise the PIN will be automatically sent after activation.
Within the If approved conditional statement click the + Add an Action, Flow Logic, or Subflow button.
Next click Action. When the menu appears, search for send PIN, and select Okta Send PIN.
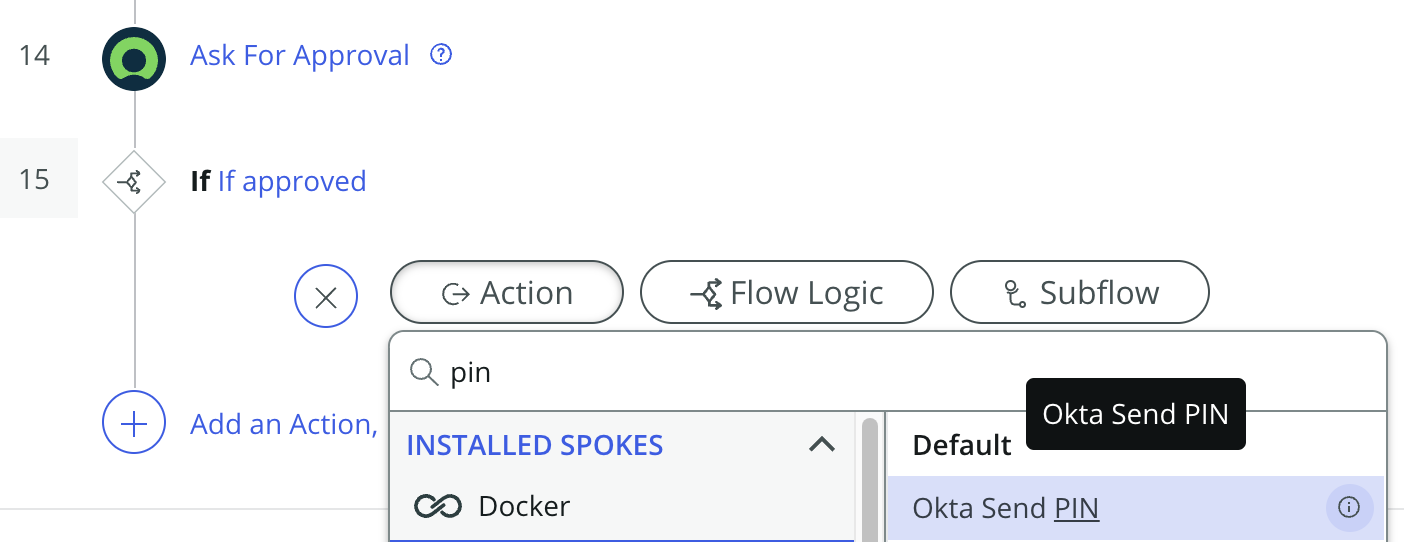
Lastly, populate the action inputs wit the following values:
- User ID: Use the data pill 2 - Okta Read User > User ID
- Authenticator Enrollment ID: Use the data pull 4 - Okta Create Enrollment > Authenticator Enrollment ID
- Fulfillment Provider: yubico
Your action mappings menu should look like the example below.

Review finalized flow
At this point, your flow should be fully configured. Use the image below to compare the steps in your implementation to ensure that you have all of the necessary components.
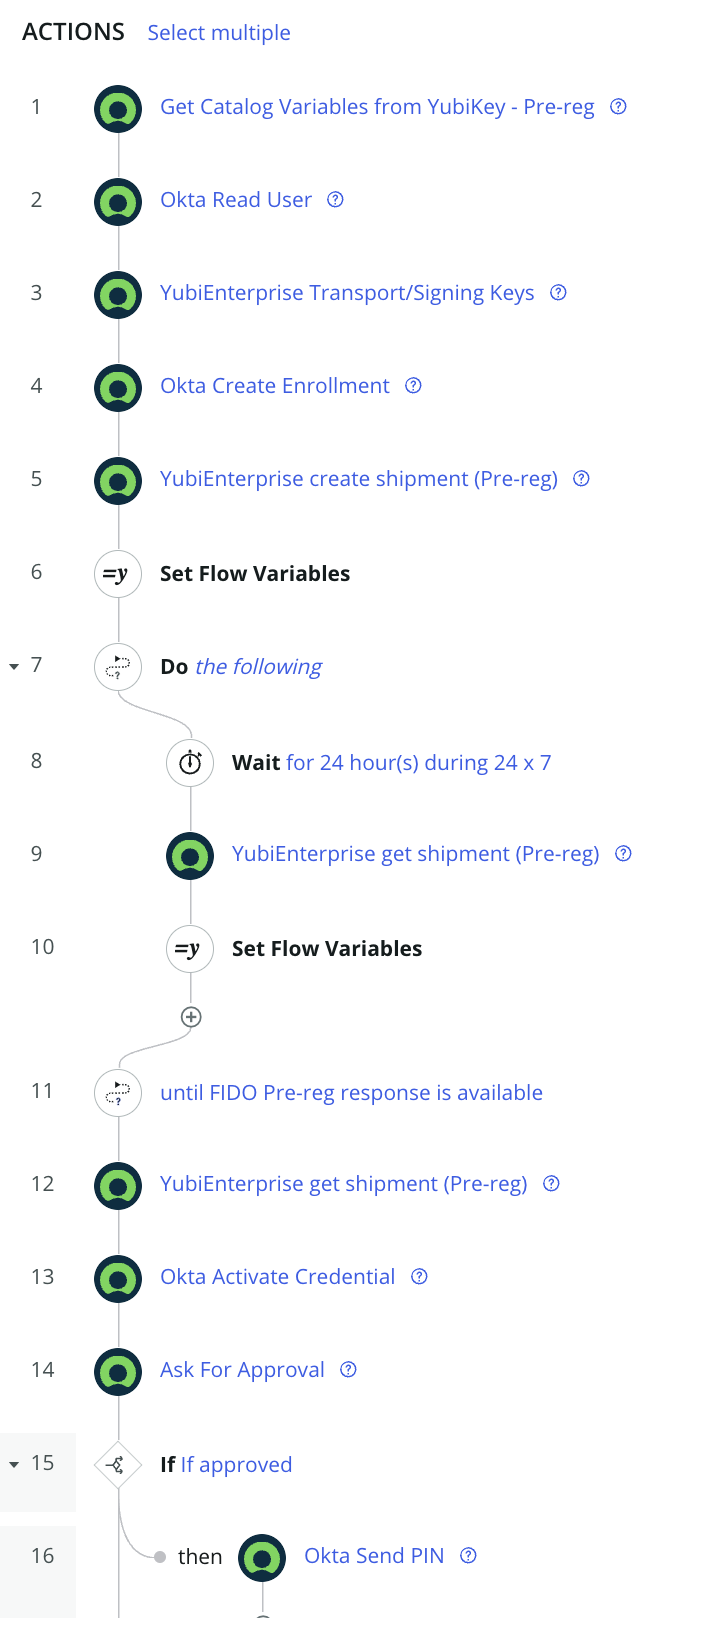
Activate the Flow
To finalize things we're going to activate the flow, and get our custom catalog item to trigger it when a new request is made.
First, click the Save button at the top of the screen. Once the flow is done saving click Activate.
Next, return to the main ServiceNow menu, and navigate back to the Catalog Builder.

Open your YubiKey - Pre-reg catalog item, either through the Recently updated items menu, or the Catalog items tab at the top of the page.

A menu may appear showing information about your catalog item. Click the Edit catalog item button.
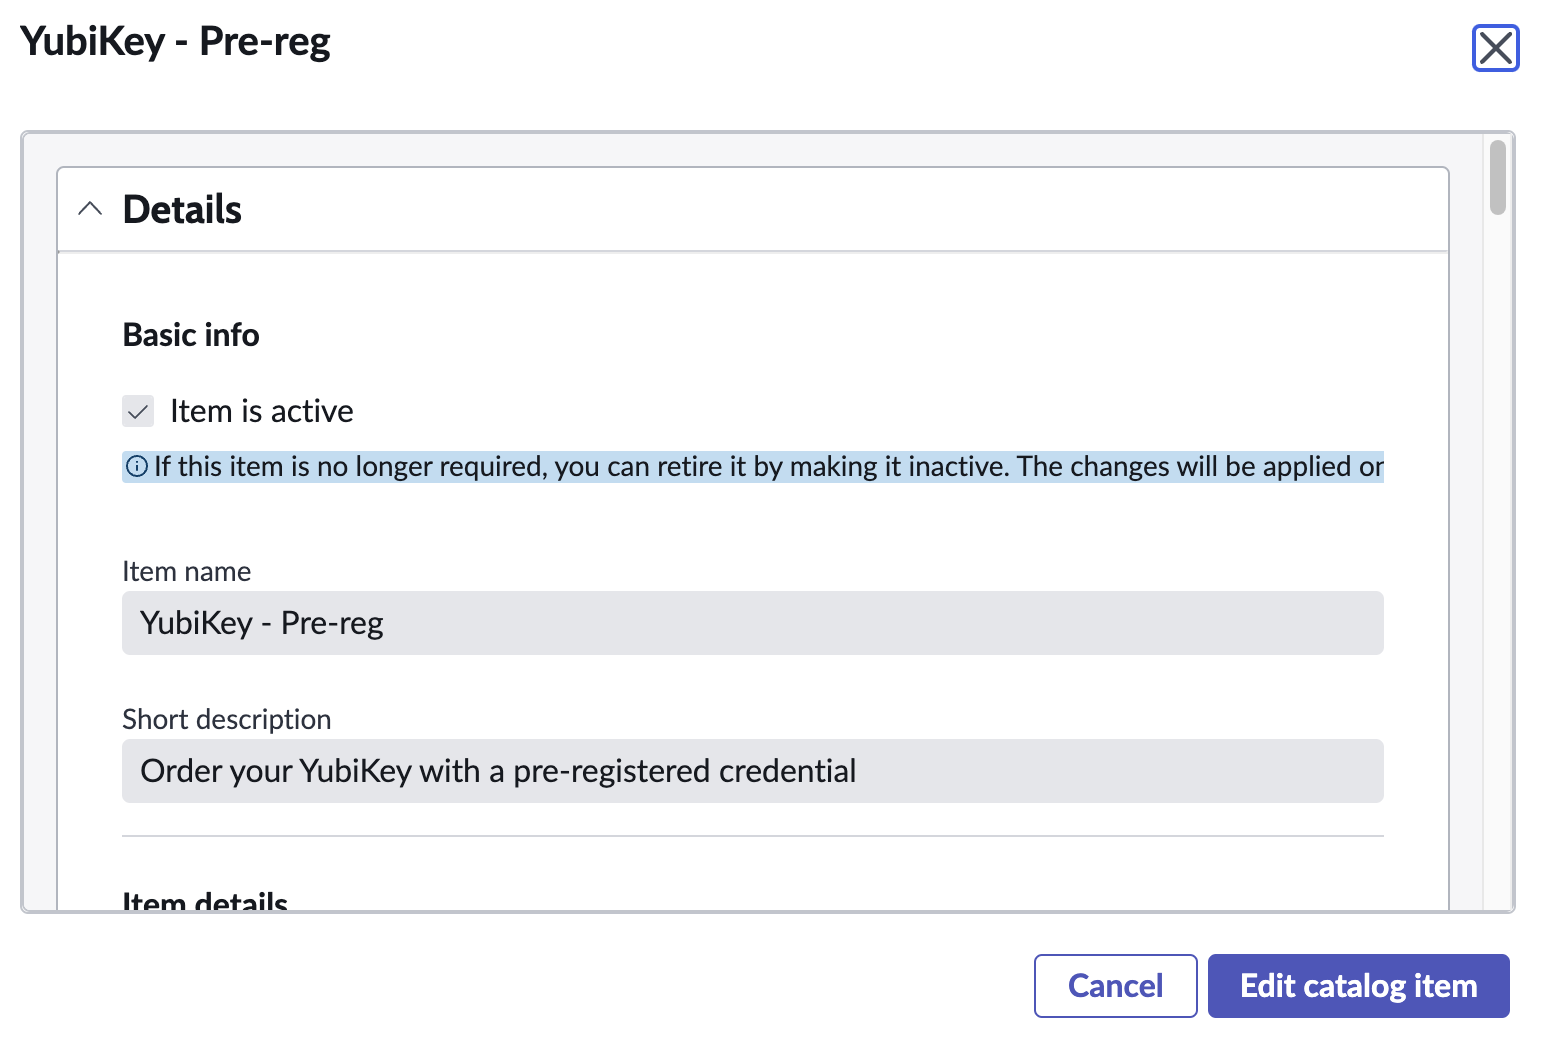
Using the navigation menu on the left, click on Fulfillment.
Once in the Fulfillment tab, we're going to change the Selected flow value to YubiEnterprise Okta Pre-reg Flow.
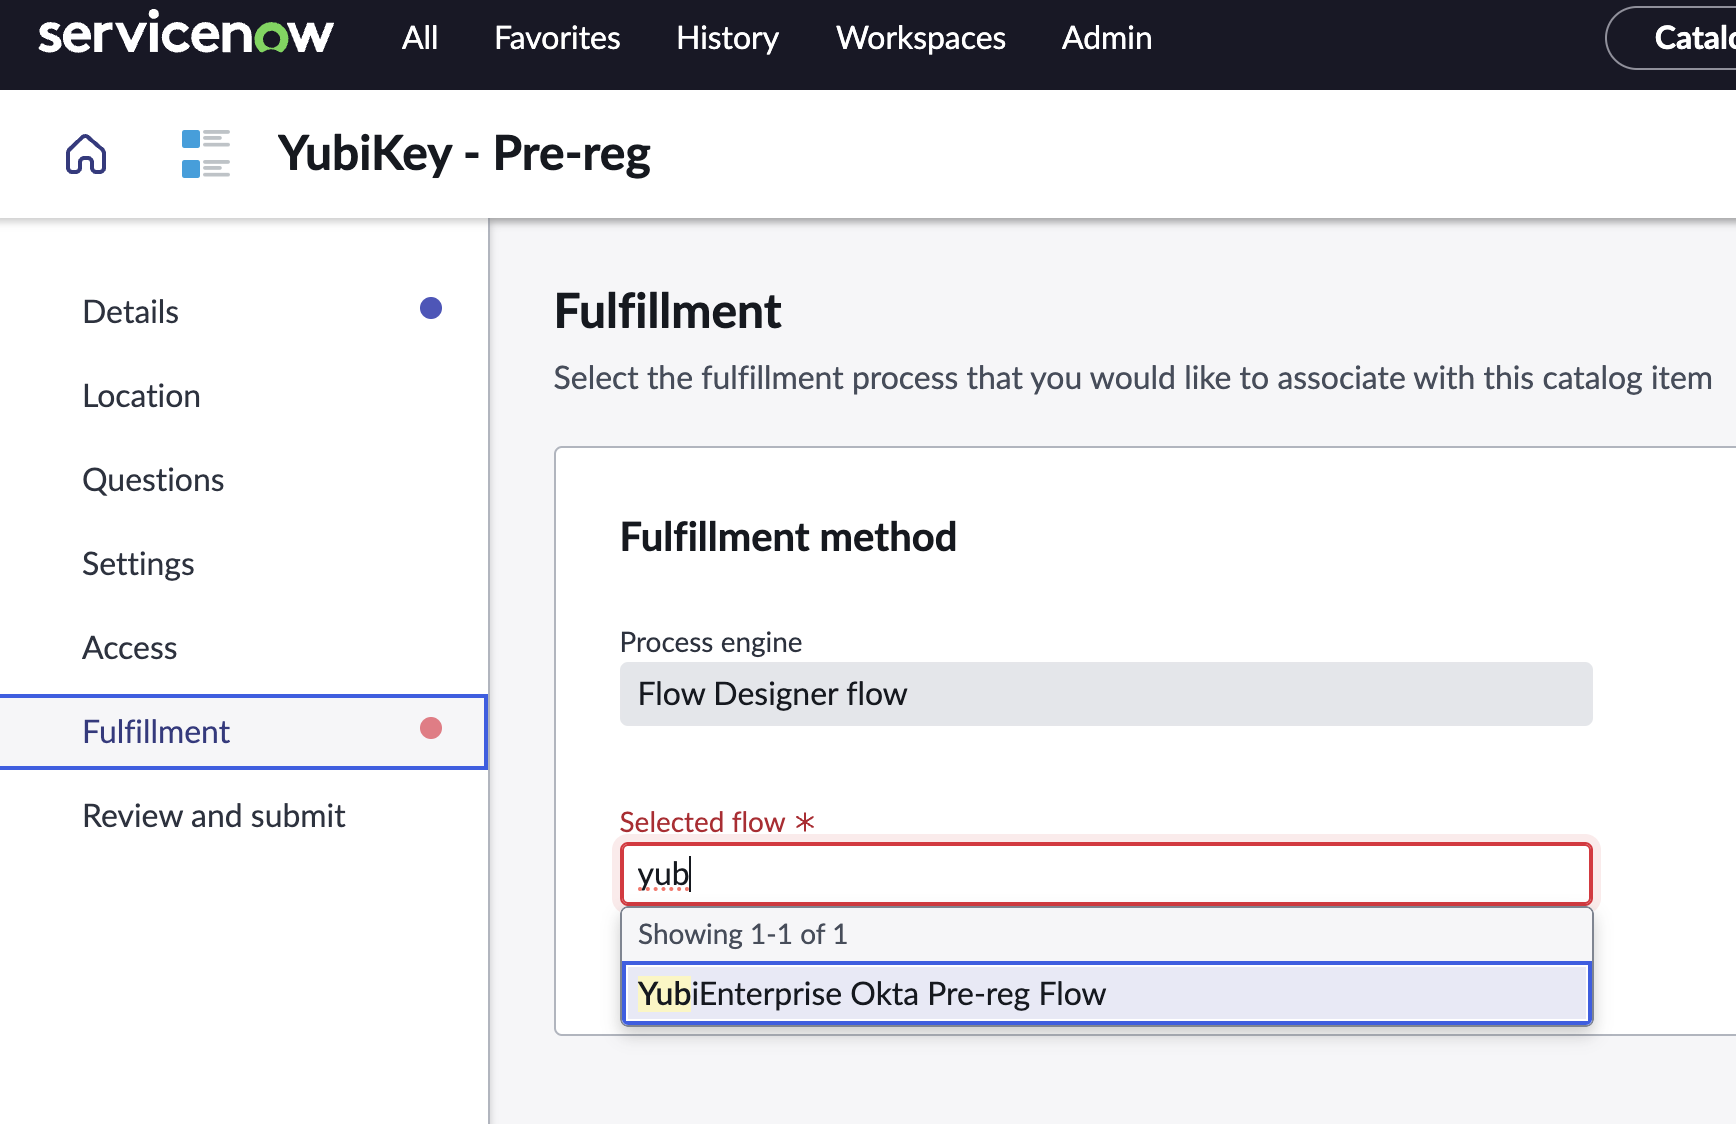
Click Save.
Once the change has been saved, click Continue to Review and Submit. When ready, click Submit.
A menu indicating that the save was successful will appear. Click Return to dashboard, or simply return to the main ServiceNow menu.
Test the flow
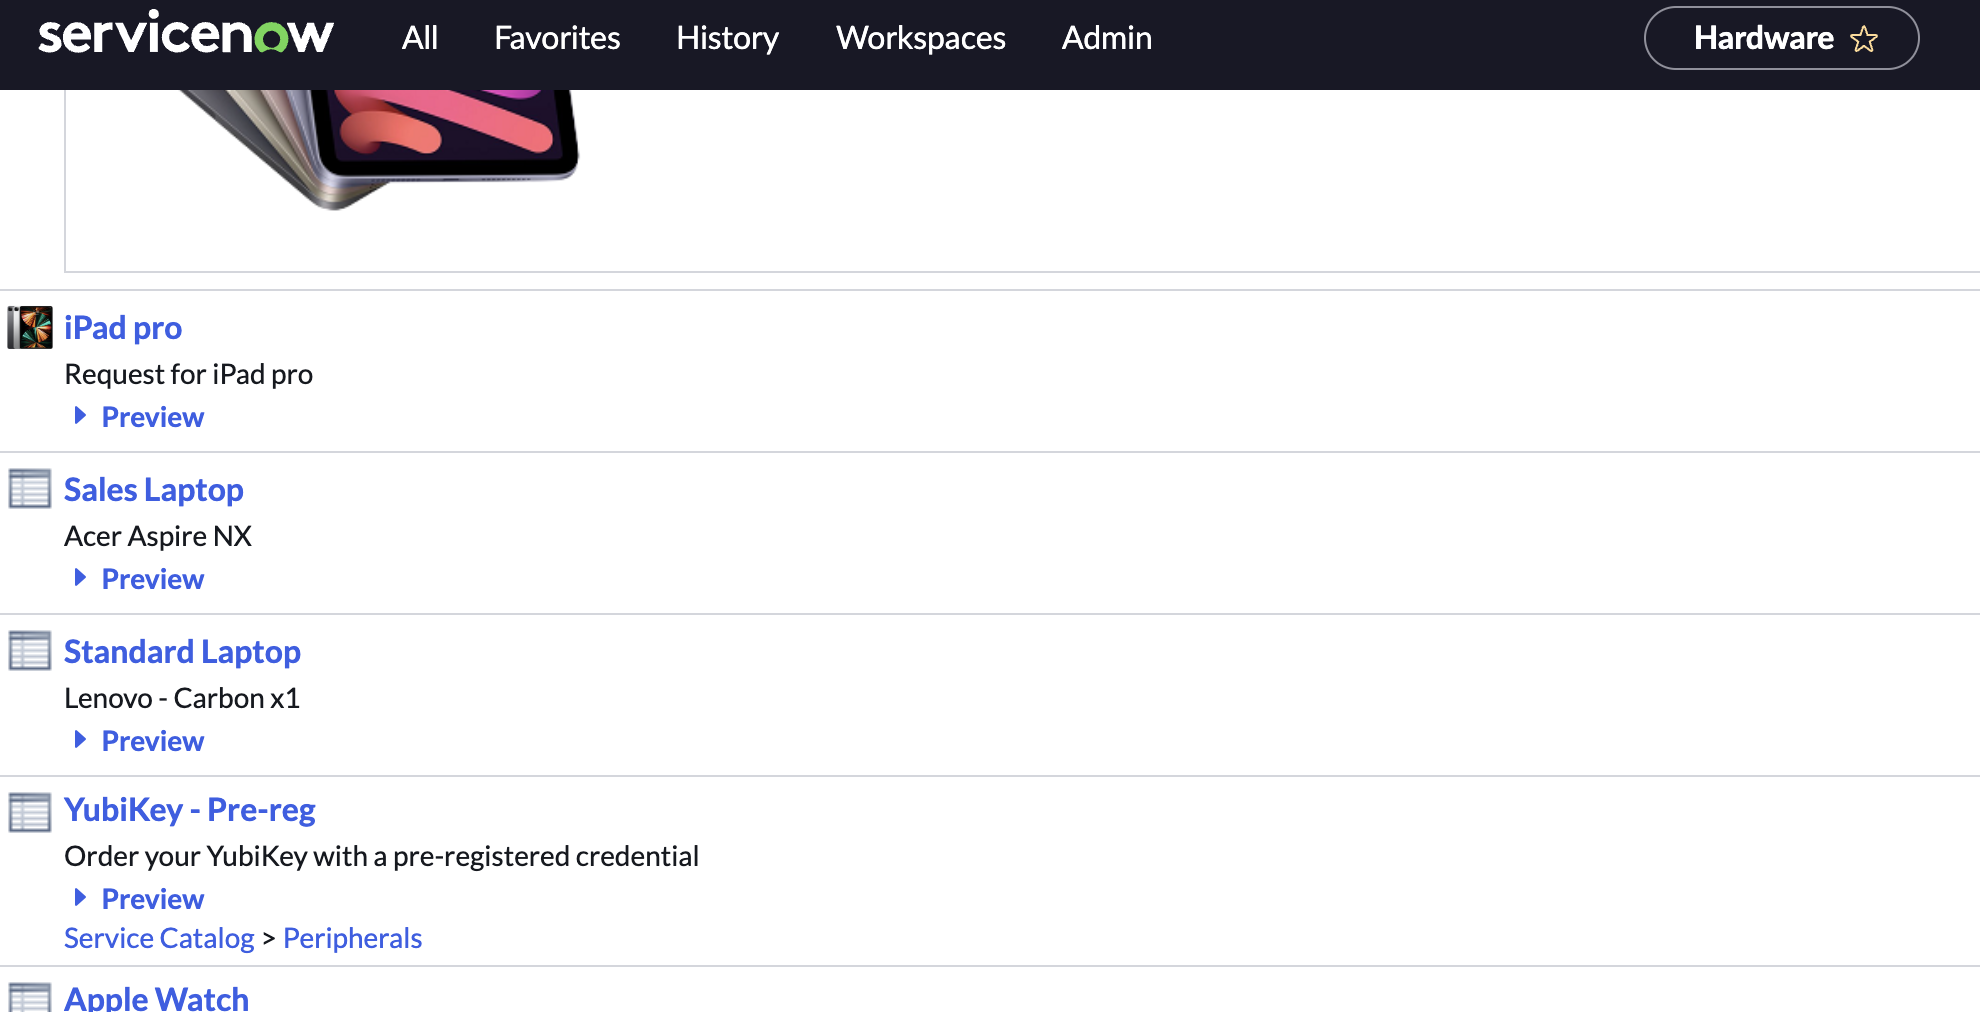
Congratulations, you've made it to the end of this guide. If you navigate to your service catalog, the YubiKey - Pre-reg item should appear, and should invoke the custom flow developed on this page. You may enter into the form, fill it in with your shipment and Okta user information, and allow it a few days to process end-to-end.
The form, flow, and actions developed over the course of this guide are yours to enhance, change, and modify - thank you for participating!