Advanced protection
This section will cover the topic of advanced protection. Advanced protection allows a user to declare that they want their account to be secured by the highest degree of assurance regardless of other convenience mechanisms. In this section we will outline how this is enabled from our client application, and the effect it will have on the user experience.
Demonstration
This first video starts with a user in their account security settings. Note how the user only has a single low assurance passkey enabled in their account. At the bottom of the page is a section for advanced protection, with the text in red that shows that the account IS NOT eligible for advanced protection; the switch is also not clickable by the user. We will start by adding two high assurance passkeys to the user's account, as denoted by the instructions presented to the user. Note how when the second high assurance passkey is added, the text turns green indicating that advanced protection is ready to be enabled.
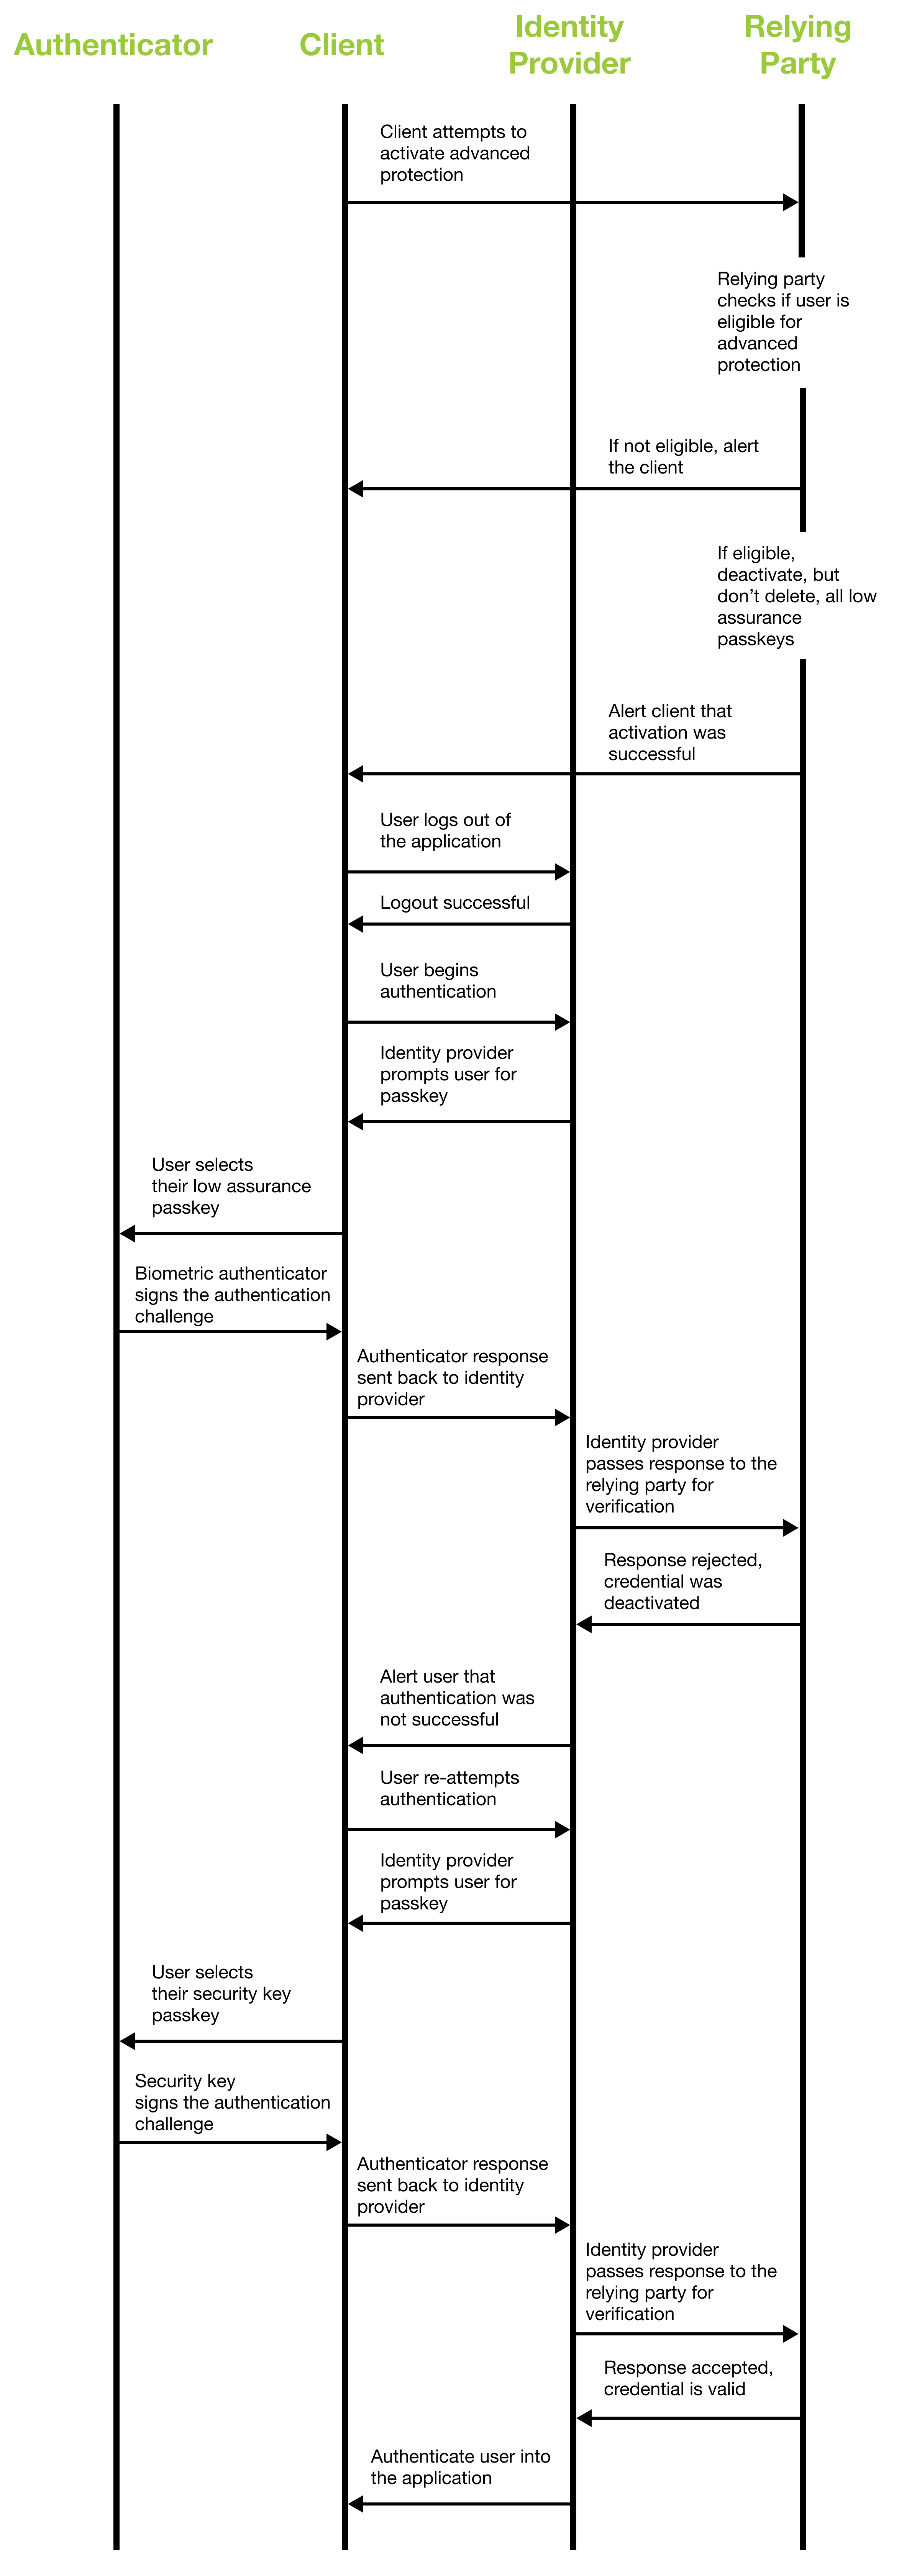
The second video shows what happens once advanced protection is enabled. The first thing to note is that the number of passkeys in the user's account list goes from three to two. These two passkeys are the two high assurance ones that were added in the previous step. The user then logs out of their account, and attempt to authenticate.
We will start by attempting to authenticate with our low assurance passkey, which will fail. We will then attempt to authenticate with one of our high assurance passkeys, which will succeed.
The third video shows a user disabling advanced protection. Note how the user's passkey list returns to three items, which includes the low assurance passkey that was originally available to their account prior to enabling advanced protection.
UX considerations
Below is a list of different user experience notes based on the demonstration above
- As shown in the video, your should properly prime the user on what it means to enroll in advanced protection. This will include:
- Outlining the requirement of two high assurance passkeys (security keys)
- Noting that all non-high assurance passkeys will be disabled while advanced protection is enabled
- Noting that all disabled non-high assurance passkeys will be reenabled once advanced protection is disabled
- To prevent confusion, you should have an indicator if a user's profile is eligible for advanced protection
Implementation guidance
This section will be broken up into different sections to describe all of the parts involved in making advanced protection possible. Note that the guidance below is meant to outline a general case for how to enable an advanced protection policy that only uses high assurance passkeys.
Sequence diagram
The sequence diagram below represents the flow of data between the different components of the application to determine if a user is eligible for advanced protection, and how the relying party will react to a user's low and high assurance credentials
